10 Essential Techniques Every Home Cook Should Know

Even if you only cook once a week, knowing a handful of core techniques makes everything about it easier, more enjoyable—and, honestly, tastier. It’s like learning the alphabet before you start writing. These simple skills help you make food that doesn’t feel thrown together, but looks and tastes a little more “restaurant” even when you’re working with everyday ingredients. Think of this as your quick cheat sheet for getting started—or leveling up.
Below are 10 key techniques that are basically the building blocks of cooking. Every cook uses them—at home or in a professional kitchen. The best part: no intimidating jargon, just plain explanations and practical tips you can actually use. Ready to level up? Let’s go.
Why bother with basic cooking skills?
Sure, you can cook “by feel”—toss everything into a pan, wait until something starts to brown (or burn), and call it dinner. Sometimes you get lucky. Often… not so much. Basic skills are your foundation. They help you:
- save time in the kitchen;
- get more consistent results;
- waste fewer ingredients;
- improvise without the fear of ruining the whole dish;
- make simple food taste noticeably better.
It’s like driving: you can learn how to start and stop, but without the rules (and a bit of technique), you won’t get far. Same thing in the kitchen. Without the basics, it’s hard to move on to bread baking, a proper stew, or even crème brûlée.
Most importantly, technique gives you confidence. And once you feel confident, cooking stops feeling like a chore.
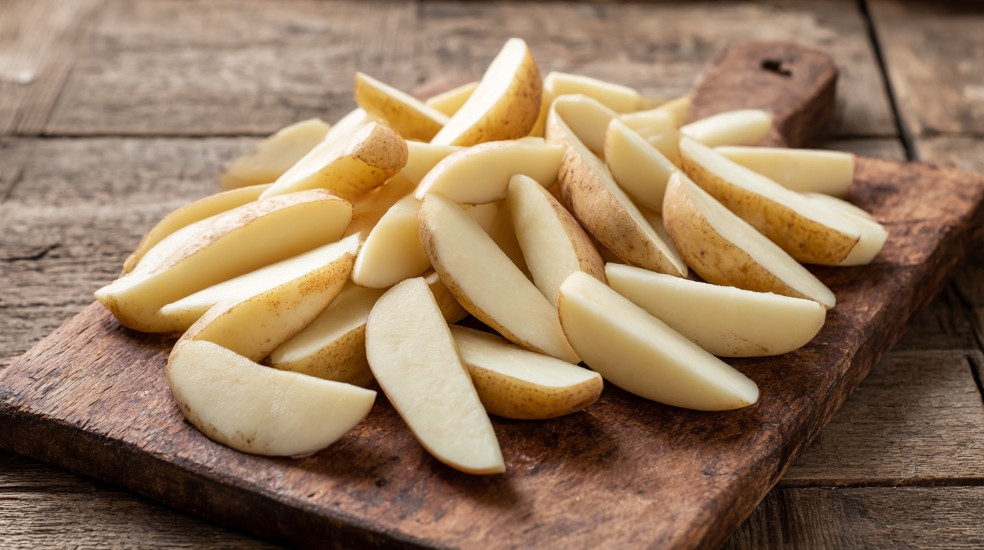
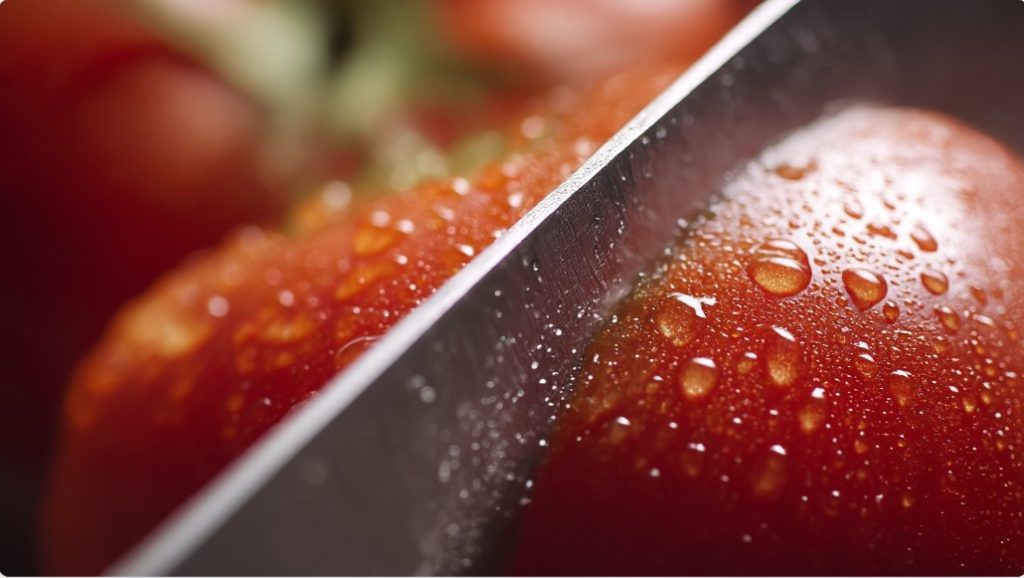
Cutting and chopping: from knife grip to perfect slices
Sounds basic, but it’s not. The way you cut vegetables affects flavor, texture, and even cooking time. Big chunks of potato take longer to cook than small ones. Uneven carrot pieces in soup cook unevenly, and in a salad they look… a bit sad.
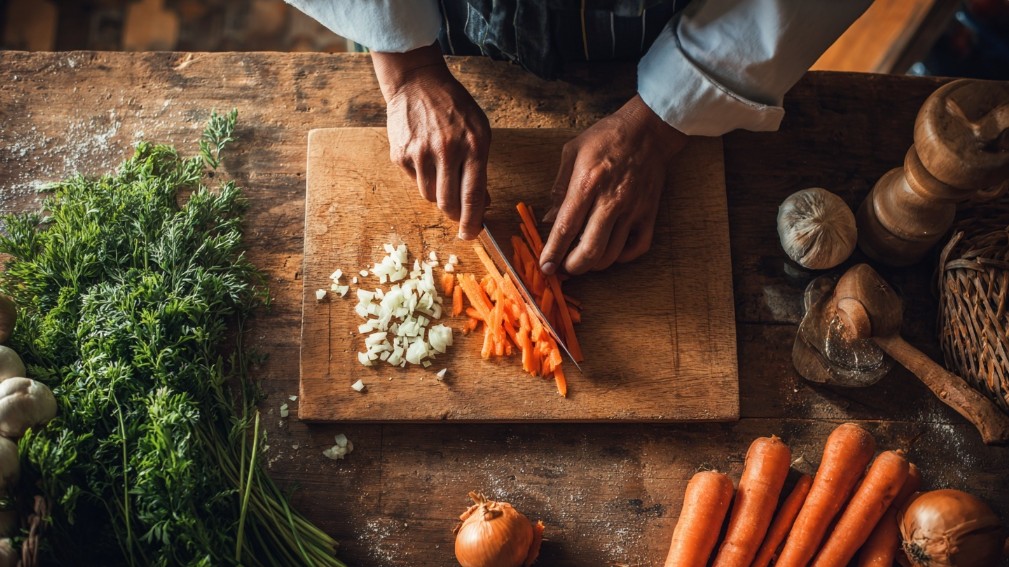
Knife skills 101:
- How to hold the knife: the handle should sit comfortably in your hand, and your other hand should form a “claw” to protect your fingertips.
- Sharp blade: a dull knife is more dangerous than a sharp one—and way harder to control.
- Stable cutting board: place a damp towel or a non-slip mat underneath so it doesn’t slide around.
Common cuts worth knowing:
- Dice — for soups, sauces, stews.
- Julienne — thin matchsticks for stir-fries, salads, and garnishes.
- Shredding/slicing thin — cabbage, onions.
- Slices — neat, thin rounds or planks (cucumber, tomatoes, mushrooms).
- Brunoise — very tiny dice (a classic fine-dining cut).
Want to chop like a pro? Practice on onions—they’re the ultimate training ingredient. And keep an eye on uniformity: it’s not just about looks, it’s what makes everything cook evenly.
Sweating vegetables: how to pull out maximum flavor
Sweating is one of those quiet kitchen “magic tricks” people often confuse with frying. It’s not the same. The goal is to soften vegetables and bring out their aroma without browning.
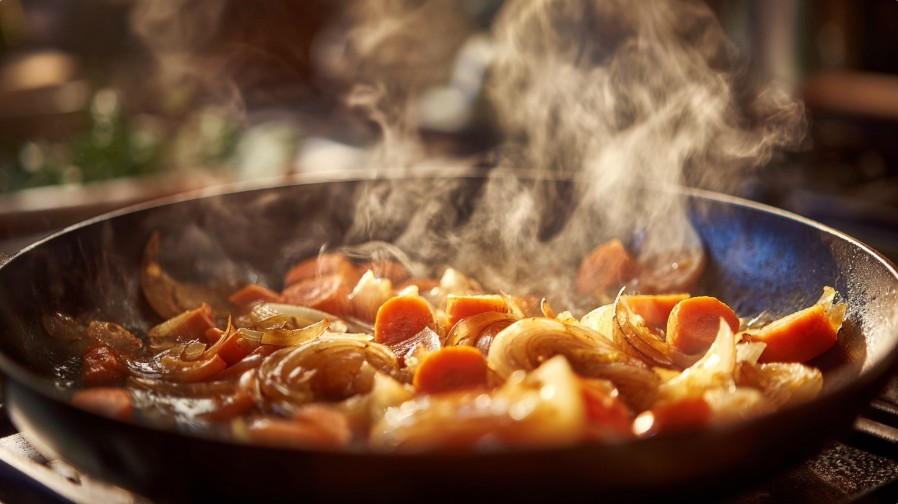
Most often you’ll sweat onion, carrot, celery root, bell pepper, and sometimes tomatoes. It’s done with a small amount of oil or butter over low to medium heat. Nothing should be burning or aggressively sizzling.
What does sweating do?
- Boosts the aroma of the dish.
- Makes vegetables soft and slightly sweet.
- Creates a flavorful base for soups, sauces, and stews—especially once you add stock or tomatoes.
How to sweat vegetables properly:
- Heat the pan over medium heat.
- Add 1–2 tablespoons of oil or butter.
- Add your finely chopped vegetables.
- Stir often. If they start to catch, lower the heat.
- Sweat for 5–10 minutes, until soft and lightly golden (but not brown).
Common mistakes:
- Heat too high. That turns into frying, not sweating.
- Overcrowding the pan. The vegetables steam in their own juices instead of softening in fat.
- Not enough time. 1–2 minutes won’t do it—this technique needs a little patience.
Want your soup to taste properly homemade and fragrant? Start with sweated vegetables. You’ll notice the difference immediately.
Blanching: quick, simple, effective
Blanching sounds fancy, but it’s so straightforward you’ve probably done it without realizing. It’s a quick dip in boiling water, followed by an immediate plunge into cold water (often ice water).

The point isn’t to fully cook the ingredient. Blanching helps you:
- Keep vegetables bright (especially green ones like spinach, broccoli, green beans).
- Peel tomatoes or peaches easily.
- Reduce bacteria before freezing.
- Tame bitterness (eggplant is a classic example).
How to blanch properly:
- Bring a large pot of salted water to a boil.
- Prepare a bowl of cold water with ice.
- Drop the ingredient into boiling water for 30 seconds to 2 minutes (depending on how firm it is).
- Transfer immediately to the ice water.
- Once cooled, remove and dry well.
What should you blanch?
- Broccoli, green beans, peas—for salads or freezing.
- Tomatoes—so the skins slip right off for sauce.
- Leafy greens—to keep them vibrant in baked dishes or pasta.
Blanching is the perfect prep move. It takes almost no time, but it gives you that restaurant-like color and texture at home. Simple, effective, and absolutely worth doing.
Caramelization: when food “browns” the right way
Sugar isn’t only for desserts. Many ingredients contain natural sugars, and that’s what drives caramelization—the process where sugars, under heat, change color, texture, and aroma and create those deep, irresistible flavors.

You can caramelize more than just plain sugar. For example:
- Onions—for burgers, salads, tarts.
- Meat—for that craveable browned crust.
- Carrots, apples, pears—for sides or desserts.
What’s actually happening?
As food heats up, natural sugars and proteins react and create new flavor compounds (the Maillard reaction). That’s the “deep” savory flavor people often associate with restaurant food.
How to caramelize properly:
- Heat a pan over medium heat.
- Add a little fat (oil or butter).
- Add your sliced ingredient (like onions).
- Don’t stir constantly—it needs contact with the pan to brown.
- Lower the heat as needed and add a splash of water or stock to prevent scorching.
Common mistakes:
- Heat too high. Food burns instead of caramelizing.
- Stirring nonstop. No browning can form.
- Not enough time. Onions, for example, need 20–30 minutes to become truly sweet and silky.
Remember: caramelization isn’t burning. It’s a balance of heat, time, and attention. Get it right, and your food suddenly tastes like it has a story.
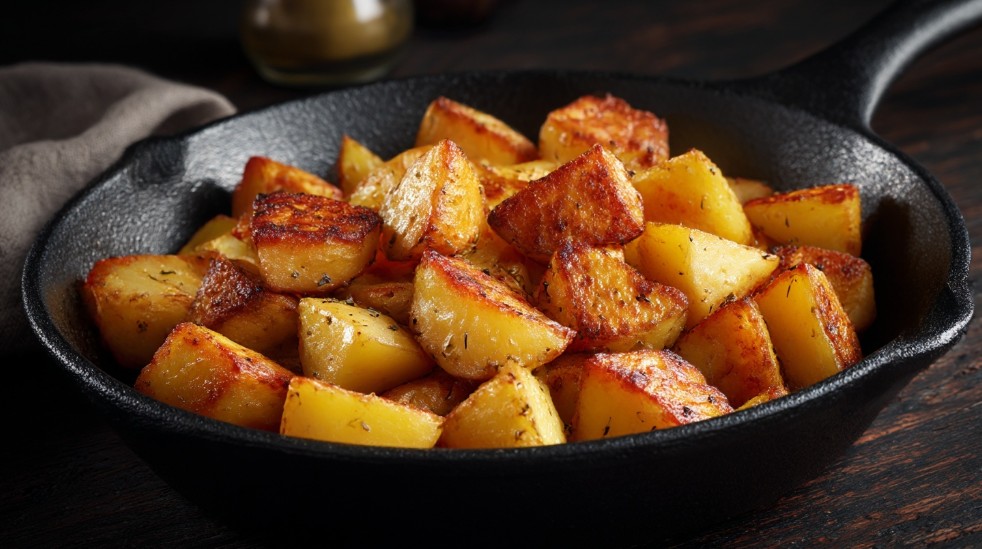
Searing and frying: a golden crust without smoking up the place
Frying is probably the most-used technique in home kitchens. We fry eggs, meat, vegetables—even bread. But doing it well is a different skill. Instead of a beautiful crust, it’s easy to end up with something dry, overcooked, and a little tragic. Here’s how to fry smarter.
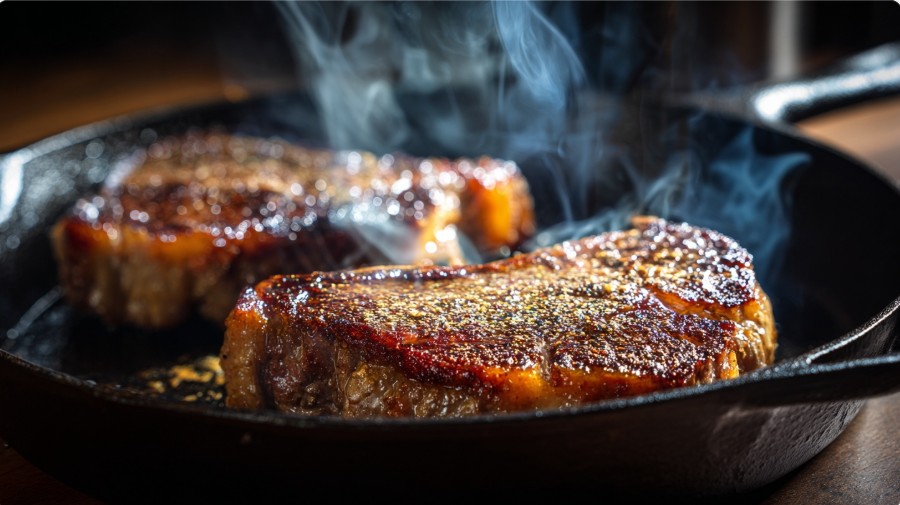
Core rules for good frying/searing:
- High heat creates crust. But don’t overdo it—if your oil is smoking, you’ve gone too far.
- Dry food browns, wet food steams. Pat ingredients dry with paper towels before they hit the pan.
- Preheat the pan. Don’t add food to a cold surface. A drop of water should sizzle—then you’re ready.
- Don’t crowd the pan. If you want browning (not a pale, watery mess), cook in batches.
Types of frying:
- Quick sear (high heat): great for meat, mushrooms, vegetables.
- Deep-frying: fully submerged in oil (fries, chebureky).
- Shallow frying: a small amount of fat (omelets, crepes).
- Sear, then braise: common for meat dishes that need tenderness.
Common mistakes:
- Not drying the ingredient—so you “boil” meat instead of searing it.
- Flipping constantly—no time to brown, and you lose juiciness.
- Using the wrong fat (like extra-virgin olive oil, which can burn easily).
Great frying is that perfect combo: golden crust outside, juicy inside. Master this and you’ll cook meat and vegetables at a genuinely restaurant-worthy level.
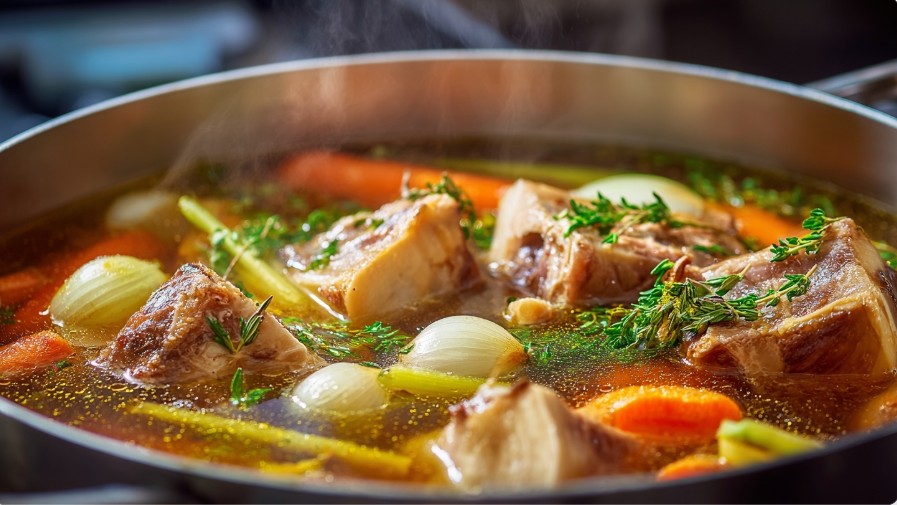
Braising/stewing: tenderness, aroma, and depth
Braising is all about patience and gentle heat. It’s where you get that layered, comforting flavor—the kind of food that feels like it’s taking care of you. A lot of classic “grandma-style” dishes are built on this technique: borscht, goulash, hearty roasts. They’re not rushed; they’re coaxed.
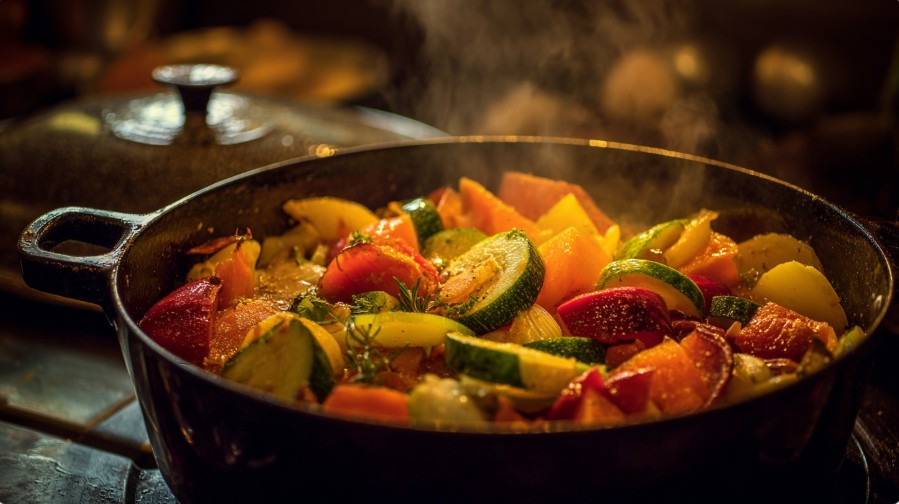
What is braising/stewing?
It’s slow cooking in a small amount of liquid (water, stock, sauce) over low heat. Over time, the ingredients absorb flavor and become incredibly tender.
How to braise properly:
- Start with searing. Brown meat/vegetables first for flavor.
- Add liquid. You want it to come partway up the ingredients, not fully cover them.
- Low heat + lid. Cook slowly (40 minutes to several hours, depending on what you’re making).
- Stir occasionally and make sure nothing sticks or burns.
Why it’s worth it:
- Makes even tougher cuts of meat soft and tender.
- Perfect for big batches that feed you for days.
- Blends flavors into one cohesive, rich dish.
What can you braise?
- Meat: beef, pork, chicken.
- Vegetables: cabbage, potatoes, eggplant.
- Fish: especially ocean fish in tomato or creamy sauces.
This isn’t just a technique—it’s a whole cooking mood. Ideal for cozy home food made with care. The only rule: don’t rush it.
Baking: what matters besides “turn on the oven”
“Bake it in the oven” sounds easy, right? Yet one person gets a crisp crust and that amazing smell filling the house, and another ends up with something raw in the middle or dry as dust. The difference is always in the details.
Basics of better baking:
- Preheat the oven. Give it at least 10–15 minutes.
- Know your real temperature. An oven thermometer helps—many ovens run hot or cold.
- Protect moisture. Some dishes (meat, baked casseroles) do better covered with a lid or foil to keep them juicy.
- Use the right setting:
- Top + bottom heat — the standard for most dishes.
- Convection — more even baking; great for cookies and bread.
- Grill/broil — for a crisp, browned top.
Tips that actually help:
- Don’t open the oven door constantly—you lose heat fast.
- Use parchment paper to prevent sticking and burning.
- If you’re baking a cake, don’t rush it out of the pan. Let it cool a bit—some cakes do well cooling in the switched-off oven with the door cracked.
What’s great to bake:
- Meat — roast chicken, ribs, pork shoulder.
- Vegetables — beets, zucchini, potatoes.
- Baked goods — from muffins to baguettes.
- Baked casseroles — sweet or savory.
Baking is a very “homey” technique. It doesn’t require constant hovering, but it gives you aroma, texture, and that golden finish that’s hard to beat. If you love the “set it and forget it” style of cooking, this one’s for you.
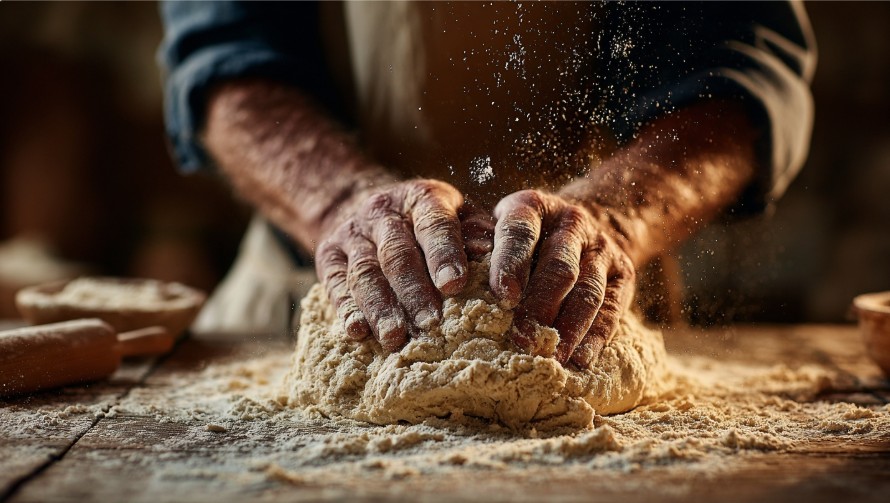
Kneading dough: the secret is in the details
Dough is the base for so many favorites—from crepes and varenyky to pizza and bread. And yes, how you knead affects texture, flavor, and even aroma. It’s not just “mix everything together.” It’s the interaction between proteins (gluten), water, and air.
Dough basics:
- Sift the flour. It aerates the flour and helps create a lighter dough.
- Combine liquids separately. It helps everything distribute evenly.
- Add liquid to flour, not the other way around. It’s easier to control consistency.
- Knead by hand or with a mixer and dough hook, depending on the type of dough.
Common types of dough:
- Yeast dough: needs longer kneading to develop gluten; rises well and becomes elastic.
- Unleavened dough: for example, for varenyky. It’s all about the right balance of moisture and firmness.
- Choux pastry: for profiteroles and éclairs; partially cooked before baking.
- Shortcrust pastry: don’t overwork it or it turns tough.
Common mistakes:
- Too much flour. Beginners often keep adding “just a bit more,” and the dough becomes dense.
- Not kneading enough. Especially important for yeast dough—it can end up weak and crumbly.
- Overmixing shortcrust. Work quickly or the butter melts and the texture suffers.
Tip: let dough “rest” for at least 20–30 minutes after kneading. It becomes easier to roll and shape, and the final result is usually softer.
Keep this in mind: well-kneaded dough is 80% of baking success. Slow down, pay attention to the feel, and you’ll get there.
Cooking eggs: omelet, poached, hard- and soft-boiled
An egg seems like the simplest ingredient on earth—yet it’s where real cooking skill starts to show. Getting eggs tender, flavorful, and not rubbery is a genuine challenge. And there are so many ways to cook them.

Key methods:
- Hard-boiled: simmer in boiling water for 9–10 minutes, then cool in cold water.
- Soft-boiled: 5–6 minutes for a runny/soft yolk.
- Poached: cook without the shell in water with vinegar for 3–4 minutes, gently shaping with a spoon.
- Omelet: whisk eggs with milk or water, cook over low heat with a lid.
- Fried eggs: cook without stirring so the yolk stays intact.
- Scrambled eggs: cook gently over low heat, stirring constantly for a creamy texture.
Tips for better results:
- Salt near the end. Salting too early can make whites tougher.
- Room-temperature eggs cook more evenly.
- Butter or a splash of cream in scrambled eggs makes them extra silky.
- Don’t overheat. Low heat = tenderness.
What about egg whites?
You can whip them into foam for meringue, sponge cakes, and mousses. The rules are simple: a clean, dry bowl and not a single drop of yolk. Otherwise, they won’t whip properly.
Eggs are a cornerstone of cooking. Being able to cook them well says as much about your skill as cooking a good steak.
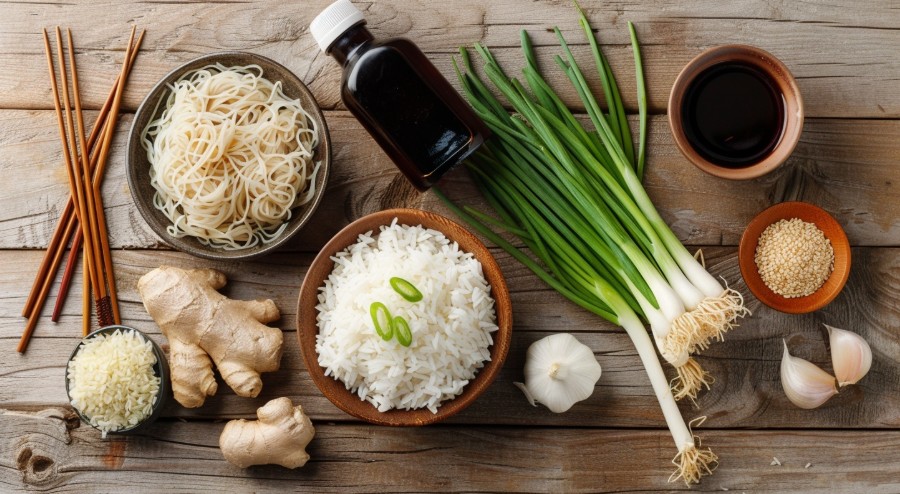
Simmering and stock: the backbone of home cooking
A good stock is an aromatic base you can turn into almost anything: soup, sauce, gravy, risotto. And while it looks like “just boiling bones,” there are plenty of small details that make the difference between bland and brilliant.
Stock basics:
- Start with cold water. It helps draw out more flavor.
- Heat slowly. Stock shouldn’t boil hard; it should gently simmer.
- Skim the foam. That’s protein that can make stock cloudy—skim early on.
- Add aromatics. Carrot, onion, celery add depth.
- Give it time. Chicken stock: 1.5–2 hours. Beef stock: up to 5 hours.
Types of stock:
- Chicken: light and fragrant—great for soups and lighter meals.
- Beef: rich and deep—for sauces and borscht.
- Vegetable: quick and easy for vegetarian cooking.
- Fish: very fast—up to 30 minutes.
Extra tips:
- Don’t salt at the beginning. Salt closer to the end.
- Strain through a fine sieve or cheesecloth for a clearer stock.
- Cool quickly and store in the fridge for up to 5 days, or freeze.
Stock isn’t just “broth.” It’s the heart of the kitchen. The better your stock, the better everything built on top of it.
Peeling, washing, and prepping ingredients
It feels like a small thing, but prep is what determines how fast, safe, and smooth cooking will be. A lot of beginners start chopping and frying before anything is ready—and end up with kitchen chaos and a so-so result.
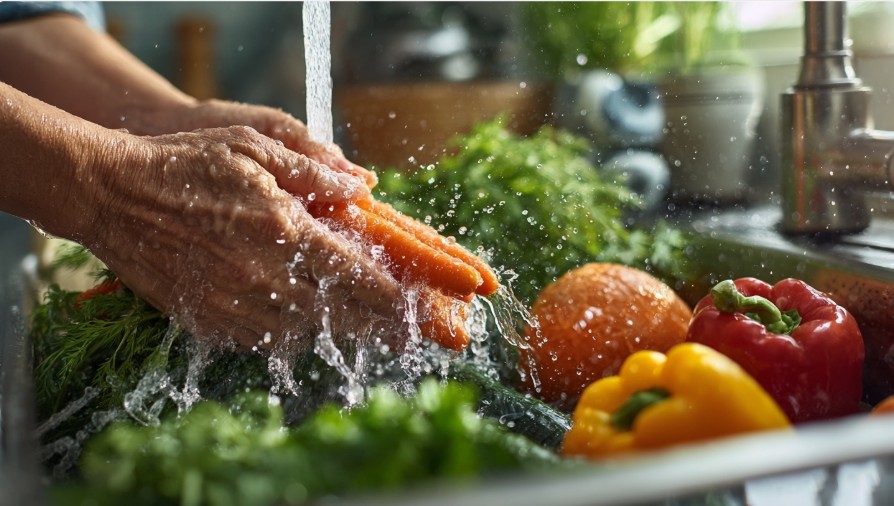
Basic prep rules:
- Wash thoroughly. Even “clean” carrots or “pre-washed” supermarket fruit.
- Peel and trim. Remove skins, seeds, pits, excess fat—whatever the ingredient needs.
- Sort and portion. Chop ahead and label containers if you’re prepping in advance.
- Dry ingredients. Vegetables, meat, and fish should be dry before searing, or they’ll steam.
- Remove the “extras.” Stray pinfeathers on chicken, gills and dark membrane in fish, etc.
Ingredients that need extra attention:
- Fresh herbs/greens: rinse in cold water a few times, then dry with a towel or salad spinner.
- Meat: trim silver skin, excess fat, bones as needed.
- Potatoes, carrots: scrub away dirt thoroughly, even if you plan to boil them.
Everyday kitchen tips:
- Use a separate cutting board for meat and another for vegetables.
- Keep knives sharp. It’s easier—and safer.
- Do a simple mise en place: set out and prep everything before you start cooking. Chefs do it for a reason—it saves your nerves.
Good prep is half the cooking. It lets you focus on the process instead of panicking and searching for an onion while the pan is already too hot.
Common beginner mistakes (and how to avoid them)
We’ve all been there: burnt porridge, over-fried eggs, or a pot of pasta that somehow turned into a sticky monster. The good news is that in cooking, every mistake teaches you something. The more you practice, the fewer disasters you have. Here are a few classics—and how to fix them.

1. Salting “by eye” without tasting
Salt is powerful. Oversalting is easy, and “saving” a dish after is much harder than you’d think.
Fix: add salt gradually and taste as you go.
2. Cooking everything on maximum heat
“More heat = faster cooking” is not how good food happens. It’s how you burn the outside and leave the inside undercooked.
Fix: learn which technique needs which heat level, and control your temperature.
3. A dull knife = a problem
A dull knife can hurt you and ruin ingredients (think: crushing a tomato instead of slicing it).
Fix: keep knives sharp. A basic sharpener is a comfort investment you’ll feel every day.
4. Not prepping enough
Chopping vegetables while something is already burning in the pan is a guaranteed stress spiral.
Fix: prep first (wash, chop, measure), then turn on the stove.
5. Being afraid to experiment
Many beginners follow recipes like they’re legal documents and panic if they need to change anything.
Fix: learn the basics first, then start small—try a new spice, swap an ingredient, adjust texture.
Keep this in mind: the kitchen isn’t a lab—it’s a creative workshop. Let yourself make mistakes, learn, and enjoy the process.
How to improve your cooking skills
So you’ve got the core techniques and you know what to avoid. Now comes the fun part: getting better—slowly, without stress, and with real enjoyment.
1. Cook regularly
It’s better to cook simple meals 3 times a week than attempt one complicated dish once a month. Consistency builds skill, confidence, and intuition.
2. Watch videos
YouTube, Instagram, TikTok—there’s a ton of cooking content out there. Pick short tutorials and recreate them at home.
3. Read recipes, but don’t memorize them
Understanding the logic of a dish matters more than copying steps. Ask yourself: “Why do we sear first?” “Why add spices at the end?”
4. Invest in a few good tools
A sharp knife, a solid pan, a decent baking dish—these make cooking dramatically easier.
5. Write down what you notice
Keep a simple cooking journal: what you loved, what went wrong, which spice you tried for the first time.
Cooking isn’t about perfection—it’s about progress. Every pot of borscht, every “oops” omelet is one more step toward real skill.
Knowing basic techniques is like learning to write: first letters, then words, then full sentences—until one day you’re creating whole culinary “novels” you want to share. Chopping, sweating, blanching, caramelizing, searing, braising, kneading dough—these simple actions become your personal cooking vocabulary.

It doesn’t matter if you cook once a week for yourself or every day for your family—these skills help you:
- cook faster with less effort;
- get better results from everyday ingredients;
- experiment and improve your favorite recipes.
And most importantly—enjoy it. Because cooking isn’t only about food. It’s love, creativity, and care. So grab a knife, put a pot of water on the stove, and start your cooking journey today.
FAQ
Скільки часу потрібно, щоб освоїти ці техніки?
Це залежить від практики. За місяць щоденного готування ви вже будете впевнено володіти базовими техніками.
Яку техніку варто освоїти першою?
Почніть із нарізання. Володіння ножем — основа більшості страв.
Чи обов’язково мати професійне обладнання?
Ні. Достатньо базових інструментів: гострий ніж, дошка, сковорідка, каструля.
Я постійно пересолюю — що робити?
Соліть поступово й пробуйте. Також можна використовувати ложку: одна “без верху” на 1 літр — як орієнтир.
Як не боятися експериментувати?
Сприймайте кухню як гру. Навіть якщо щось піде не так — це лише досвід, і він обов’язково стане вам у пригоді наступного разу.