
Old-fashioned cookie recipes require patience. There are no spices or flavors to mask anything here. The taste and texture rely solely on the lard, flour, and how they’re handled.
The challenge often starts before they even hit the oven. People tend to warm the lard with their hands, overwork the dough, and then try to fix things with temperature adjustments. It doesn’t work. If the dough is warm, it will spread no matter what the recipe says.
These cookies are simple but demanding in terms of details. Ingredient temperatures, chilling time, and dough thickness all matter. That’s the secret to consistent results.
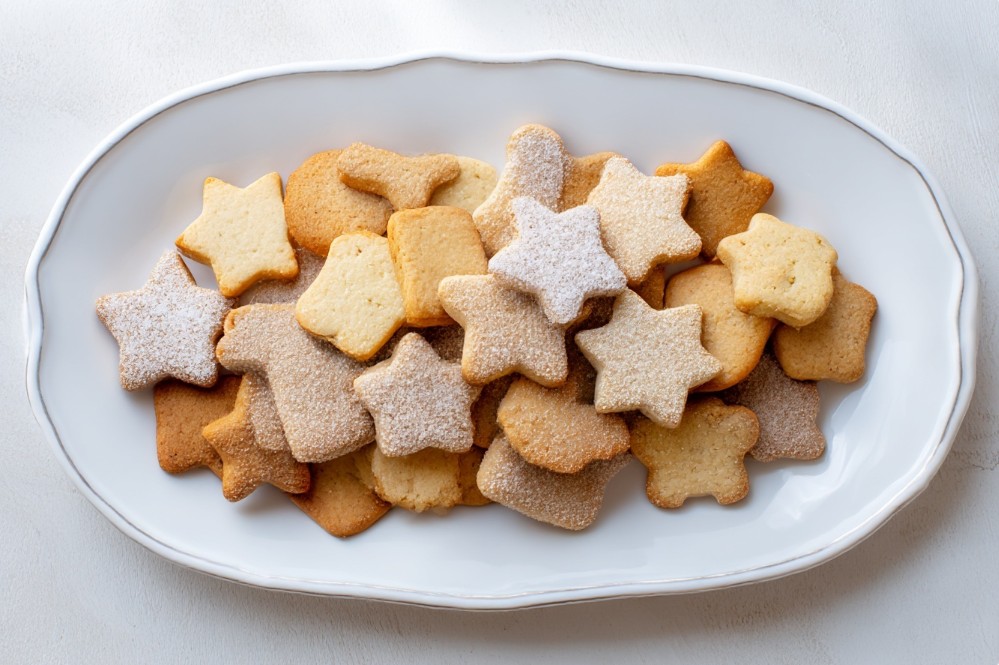
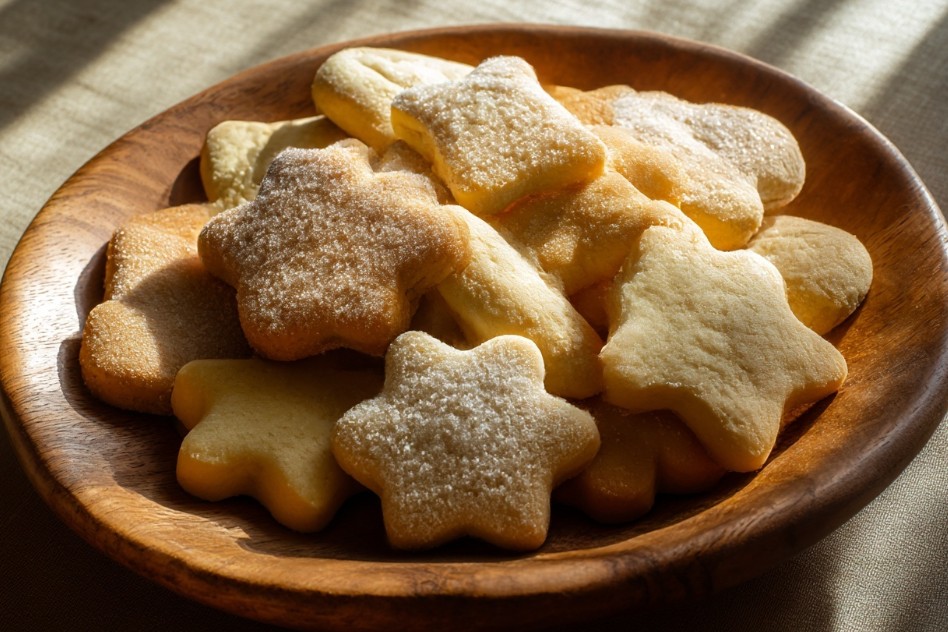
Old-Fashioned Lard Cookies
Ingredients
- 200 g Lard Use high-quality lard for the best flavor.
- 100 g Sugar You can substitute honey if desired.
- 400 g Flour Sift the flour before use for a lighter dough.
- 1 tsp Baking Soda Helps make the cookies a bit fluffier.
- 1 packet Vanilla Sugar Adds a pleasant aroma to the cookies.
- 1 pinch Salt Enhances the dessert’s flavor.
- 1 Egg For binding the ingredients.
Method
- Cut the lard into 1–1.5 cm cubes and place in a cold bowl. Add sugar and begin to blend with a spoon or spatula, without rushing. Do not beat or warm the mixture with your hands—keep the lard temperature below 18°C. Blend until the sugar disappears into the fat and the mass is smooth and matte, without gloss. If it becomes glossy, stop and chill the bowl for 5–10 minutes.
- Remove the egg from the fridge at least 30 minutes before use. Add it to the mixture and quickly combine, not aiming for uniformity right away. The mixture will initially break apart—this is normal. It will come together after 20–30 seconds. If not, the lard was too cold; let it sit for a minute and then continue.
- Mix the flour with the baking soda and add in parts, about 2–3 tablespoons at a time. Briefly combine after each addition, without kneading. Many break the dough by trying to make it ‘smooth’—there’s no need for that here. When the dough stops sticking to your fingers and forms a ball easily, stop, even if there’s flour left.
- Shape the dough into a flat disk about 2–3 cm thick, wrap it up, and place in the fridge for at least 40 minutes. The dough should be cold but cuttable with a knife without crumbling. If it’s rock-hard, let it sit for 5 minutes on the counter. If it’s soft and pliable, put it back in the fridge. This balance ensures the cookies won’t spread in the oven.
- Roll the dough between two sheets of parchment to a thickness of 6–7 mm. Thinner will dry out, thicker won’t bake evenly. Apply even pressure without pressing on the edges. Cut shapes immediately and transfer to a baking sheet, handling the dough for only a few seconds.
- Preheat the oven in advance to 170°C, no higher. Bake the cookies for 14–18 minutes, depending on thickness and the metal of the baking sheet. Focus on the bottom, not the top: it should be dry and slightly browned. The top will remain light—that’s normal.
- After baking, leave the cookies on the sheet for another 3–4 minutes. They’re fragile when hot and can break easily. Once the structure sets, transfer to a rack and let them cool completely. The final crispiness will develop after full cooling, not immediately.
Notes
- The mixing bowl should not be warm.
- If the dough starts to shine, it’s overheated.
- Don’t add flour when rolling out, instead chill the dough.
- Don’t re-roll scraps more than twice.
- Thin cookies dry out before they color.
- Parchment is more reliable than silicone.
- The bottom, not the top, indicates doneness.
- Hot cookies are always more fragile than they seem.
- A metal tin preserves structure better than a bag.
Private Notes
Tried this recipe?
Let us know how it was!These cookies belong to a traditional Ukrainian baking style where lard is often used for texture.
Explore more lard-based cookie recipes.


Responses