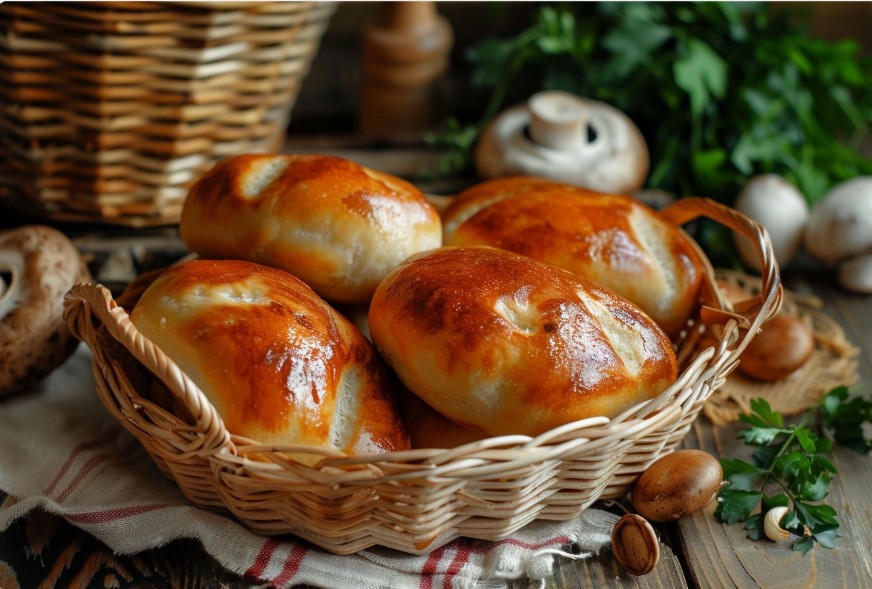
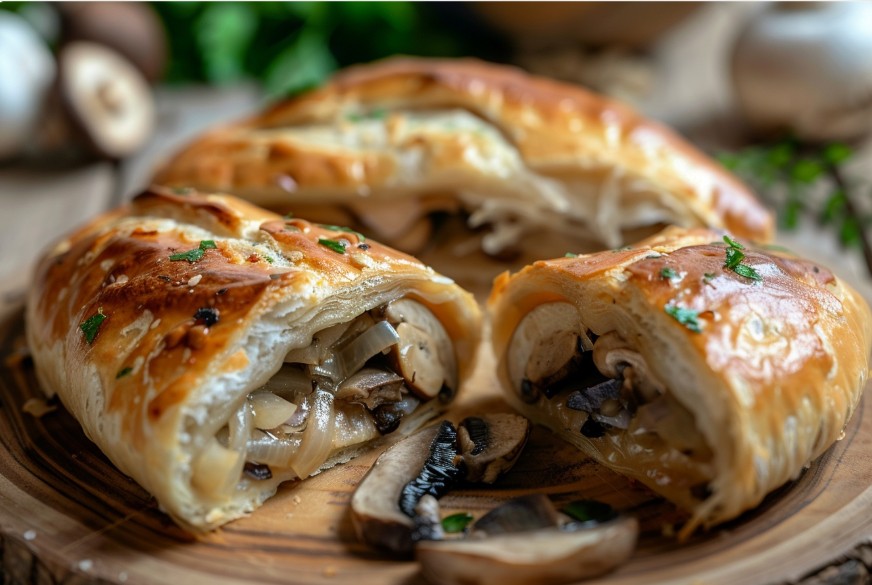
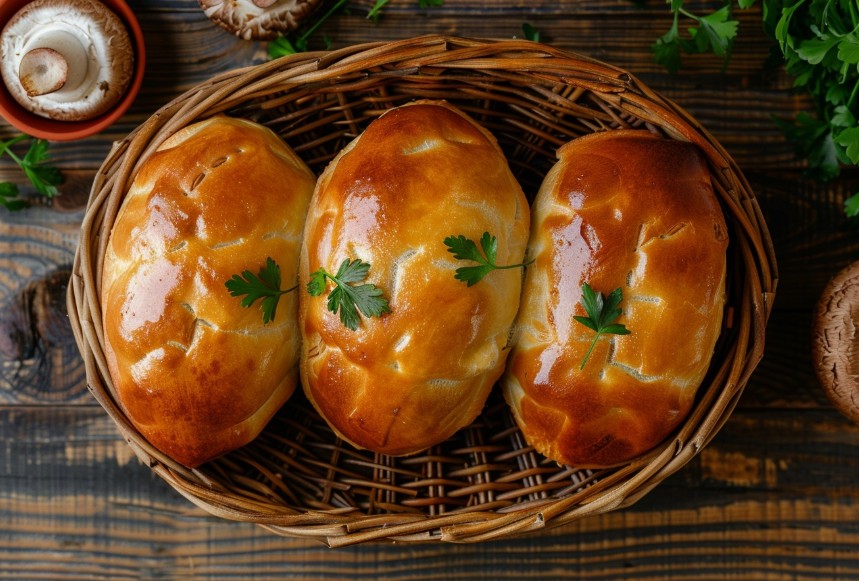
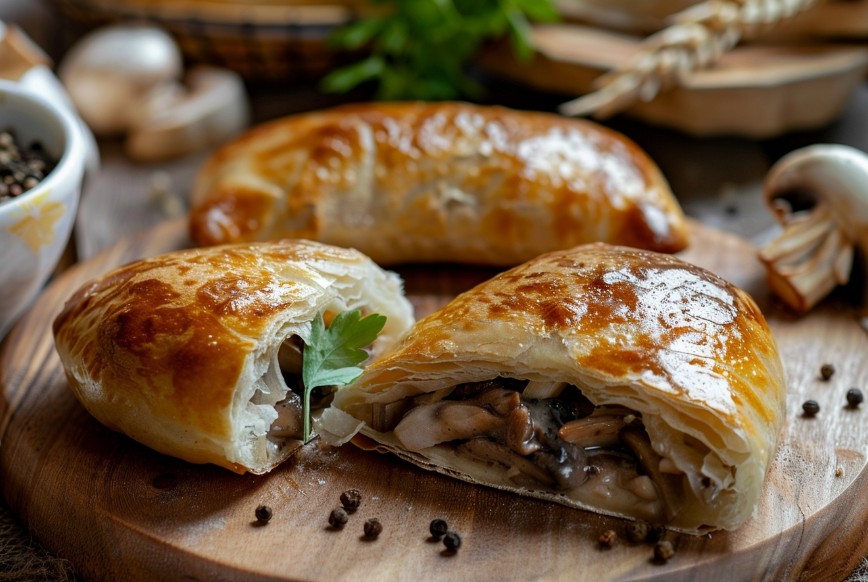
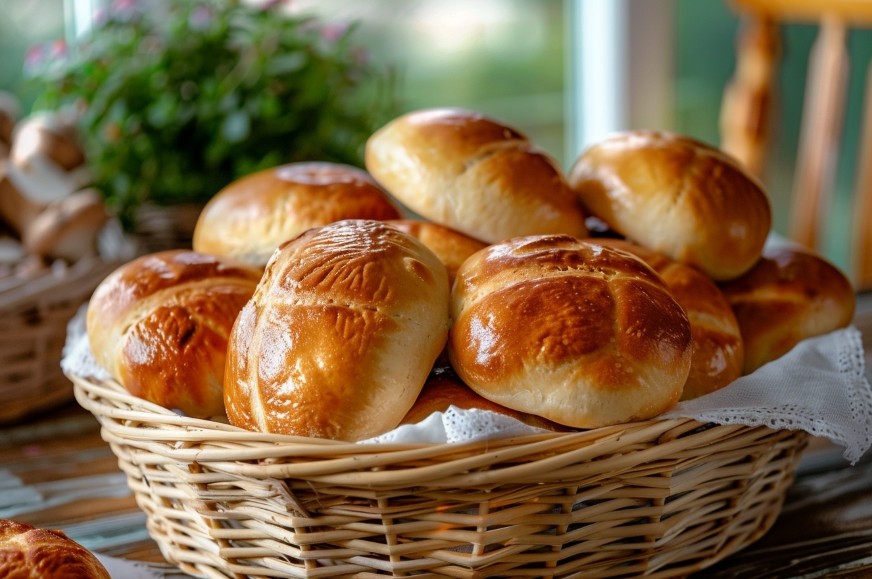
When you’re craving proper homemade baking, the usual headache is this: the filling leaks, the dough goes soggy, and your little buns split or burst in the oven. The fix here is all about mushrooms—drive off the moisture properly. First, high heat to evaporate, then a gentle finish so the flavour stays concentrated. The dough is mixed with warm milk, so it rises evenly and doesn’t tear when you pinch the seams. Shaping is straightforward: small rounds, 1–1.5 tbsp filling, then a firm, well-sealed seam. Keep baking steady at 180°C so the crust sets while the centre cooks through. The result: piroshky that don’t “swim,” don’t dry out, and smell like mushrooms long before they’ve even cooled.
In this recipe, you’ll learn
- Why you’ll love this recipe
- Tips before you start
- What to look for when choosing ingredients
- Secrets to perfect mushroom piroshky
- How to serve mushroom piroshky
- Nutritional perks
- Recipe variations
- Questions & answers
- Common mistakes
Why you’ll love this mushroom piroshky recipe
I live for that moment when you break one open and it’s all hot mushrooms and onions inside—no puddle of liquid soaking the crumb. Compared to Ukrainian dumplings with mushrooms, these are grab-and-go: one or two piroshky and you’re sorted, no sauce hunt required. Crisp on top, soft in the middle—proper comfort food, just a lot easier to put on the table.
- Thin, tender dough with a generous filling
- Mushrooms cooked down so the filling stays dry (in a good way)
- Even golden crust at 180°C
- Easy to pack for work, school, or travel
- Just as good warm as they are cold
Tips before making mushroom piroshky
I once watched a bakery cook the filling longer than they kneaded the dough—and honestly, that’s the whole trick. Let the mushrooms really steam off on high heat for 7 minutes so your seams don’t pop open later. The dough benefits from a cosy rest under a towel for 45 minutes—it turns stretchy and easy to seal. While it’s rising, line your baking tray, set out the parchment paper, and keep a small bowl of water nearby (handy for slightly dampening your fingers if needed when shaping).
- Let the filling cool to warm (not hot) before shaping
- Pinch the seam with dry fingers for the best seal
- Add flour in small amounts—don’t dump it in
- Leave 3–4 cm between buns on the tray
- Brush egg wash in a thin layer
What to look for when choosing ingredients for mushroom piroshky
For the filling I usually use button mushrooms, then sneak in a small handful of dried porcini—those are what give you that deep, woodsy “forest” aroma. Warm the milk to a comfortable 38–40°C so the yeast behaves nicely. And dice the onion small; it melts into the filling instead of taking over.
Dried porcini
Soak in 120 ml hot water for 15 minutes; add 1–2 tbsp of the strained soaking liquid to the filling for extra aroma.
Button mushrooms
Slice 3–4 mm thick and fry in batches so they brown instead of stewing.
Milk
Aim for 38–40°C: cold milk slows the rise, hot milk can weaken the yeast.
Wheat flour
Sift once; only add the last 50–80 g if you truly need it—the goal is soft dough that’s slightly tacky.
Sunflower oil
Use neutral oil for the dough; if you like, add a tiny splash of fragrant oil to the filling right at the end.
Secrets to perfect mushroom piroshky
The big one: stick to 180°C—don’t creep higher. Hotter ovens brown the tops before the centres have a chance to bake through. Second: keep the filling dry and the dough warm (not hot) while shaping.
- Fry mushrooms in batches, not all piled in at once
- Cool the filling before you start shaping
- Roll the rounds to about 2 mm thick
- Press out trapped air along the seam
- Give them a 15-minute proof on the tray
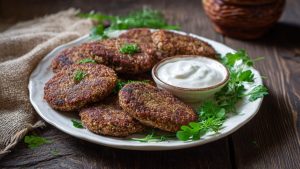
How to serve mushroom piroshky
Serve them hot with cold sour cream—the contrast keeps everything sharp and savoury. Or let them cool completely: the crust firms up a bit and the filling tastes even more intense. They’re also a great little something to bring out when you want to treat people to an easy, cosy supper—see more ideas here: what to make for dinner.
- With sour cream and fresh herbs
- With kompot (dried fruit drink) or a strong cup of tea
- Alongside borscht instead of pampushky
- With pickles on the side
- Packed into a lunchbox with a simple salad
Nutritional perks of mushroom piroshky
Mushrooms add protein and fibre, so these feel more satisfying than a plain bun. They’re also a good source of B vitamins, which support everyday energy metabolism. And because they’re baked (not deep-fried), the overall fat stays pretty reasonable—especially if you go easy on the oil when cooking the filling.
- Fibre helps you stay fuller longer
- Protein from mushrooms and milk
- B vitamins from mushrooms
- Moderate fat content thanks to baking
Mushroom piroshky variations
In summer I keep the filling lighter—fresh dill and a bit of spring onion stirred in right at the end. In winter I lean into richer flavours: dried mushrooms, a pinch of thyme, and a spoonful of thick sour cream mixed into the filling.
- Button mushrooms + oyster mushrooms, 50/50
- Add 1–2 tbsp sour cream to the filling
- Herby version with dill and parsley
- Thyme + dried porcini for a deeper flavour
- Potato add-in: 1:1 with mushrooms
Questions & answers
Got leftover filling, or the dough rose faster than you expected?
How do I store mushroom piroshky so they don’t dry out?
Let them cool completely, then pack into a lidded container with sheets of parchment between layers. Keep at room temperature for up to 24 hours, or refrigerate for 2–3 days; reheat for 5–7 minutes at 160°C.
How many piroshky does this dough make?
Usually about 12 medium piroshky (70–80 g each). If you make smaller ones (50–55 g), you’ll get around 16, and the baking time will drop by about 2–3 minutes.
Why does the filling taste bitter?
Most often it’s over-fried mushrooms or burnt onion. Cook the onion over medium heat until translucent, and fry the mushrooms over high heat but for a short time, stirring frequently.
What if the dough sticks to my hands and the counter?
Rub your hands and rolling pin with 1 tsp oil, or lightly dust the surface with flour. If you add extra flour to the dough, do it 1 tbsp at a time—too much will make the piroshky dense.
Common mistakes when making mushroom piroshky
So why didn’t they work out? It’s usually one of two things: the dough didn’t proof properly, or the filling was still too wet. It feels like a few minutes in the pan can’t possibly matter—but those minutes are exactly what saves you from soggy bottoms and split seams in the oven.
Why did my piroshky open along the seam?
The filling was too hot or too wet. Cool it to warm, and cook off the liquid over high heat for 5–7 minutes—then the seal will hold.
Why is the dough tight and hard to roll?
Too much flour. Keep the dough soft and slightly tacky; for handling, grease your hands with a drop of oil or dust the counter very lightly.
Why is the bottom burnt but the top pale?
The tray was too low in the oven, or the temperature was too high. Bake on the middle rack at 180°C; parchment paper also helps even things out.
What if the dough is still underbaked inside?
The piroshky were too large, or the final proof was too short. Aim for 70–80 g each, give them 15 minutes to puff up on the tray, and bake an extra 5–8 minutes, covering the top with foil if it’s already browned.


Responses