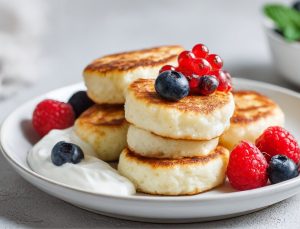
Lactose-Free Cottage Cheese Pancakes (Syrnyky): How to Adapt the Recipe

Some mornings you just want something simple and homemade—warm cottage cheese and vanilla in the air, a pan quietly sizzling, and a plate filling up with golden little rounds. And of course, that’s usually the exact moment someone says, “Oh right… I can’t do lactose,” or “Regular farmer’s cheese is too heavy for the kid.”
I’ve seen it a hundred times: people aren’t against cottage cheese pancakes (syrnyky)—they’re against the aftermath. And they’re also against that sinking feeling that they now have to say goodbye to a favorite comfort food forever. In reality, lactose-free syrnyky aren’t about “cutting the joy.” They’re about a couple of smart swaps and slightly different logic when it comes to the batter.
And yes, sometimes you have to accept they won’t be a perfect carbon copy of “grandma’s.” But they can still be just as tender, golden, and crisp around the edges—just with different ingredients and a bit more precision. Below is how I do it in real life: what to change, how not to drown the batter in flour, how to handle wet cottage cheese, and what to do if your syrnyky spread or turn “rubbery.”

Why lactose-free syrnyky behave differently
Here’s the simplest kitchen truth: syrnyky aren’t a “recipe,” they’re a balance—moisture, protein, starch, and temperature. The second you swap the cottage cheese or add a different dairy product, that balance shifts, and the batter starts doing its own thing.
Most lactose-free dairy is made by adding the enzyme lactase, which breaks lactose down into simpler sugars. Taste-wise, that often reads as a gentle extra sweetness. It sounds minor, but it can affect browning: the crust may darken a little faster.
There’s another factor too: texture. Some lactose-free cottage cheese is creamier; some is drier—brand to brand, it really varies. And syrnyky are extremely sensitive to moisture. I once cooked with the exact same “set” of ingredients but two different packs of lactose-free farmer’s cheese and got two totally different outcomes: one batch held its shape like champs, the other batch was basically trying to become crepes.
The main takeaway: adapting isn’t about finding one magic substitute. It’s about learning to read the batter and adjust.
A quick reality check: there’s no such thing as perfect syrnyky
Honestly, even “regular” syrnyky don’t come out identical every time. Humid weather makes cottage cheese weep more, eggs vary in size, flour absorbs differently. So if your lactose-free syrnyky aren’t perfectly round on the first try, that’s not a failure. That’s just cooking.
Which cottage cheese to choose: lactose-free dairy, plant-based, or a mix
The key here is not to back yourself into a corner. “Lactose-free” doesn’t always mean “dairy-free.” A lot of people do great with lactose-free farmer’s cheese (still dairy, just with the lactose broken down). Others need fully plant-based options. Both can work—but they behave differently in the pan.
Lactose-free farmer’s cheese (dairy, but without lactose)
This is the closest to the classic version. If you want syrnyky that taste “like usual,” start here. Look for cottage cheese that’s not overly creamy and actually holds its shape. If it looks like a smooth spread in the pack, your syrnyky may also want to become a smooth spread on the skillet.
Tip: if the cottage cheese feels too wet, I let it sit in a sieve or cheesecloth for 10–15 minutes. Even a short drain changes the batter a lot.
Plant-based “cheeses” and yogurt-style bases
You can absolutely make tasty syrnyky with them, but the vibe is different. You’ll usually get less of that curdy, grainy “cheese” feel and more creaminess. These mixtures tend to like starch (cornstarch or potato starch) and gentle heat. Overcook them and they can turn dense.
I don’t love promising a plant-based version will be “exactly the same.” It won’t be. But different doesn’t mean worse. Just don’t chase the flavor of classic farmer’s cheese—lean into aromatics instead: citrus zest, vanilla, cinnamon, raisins.
A mixed option for real life
When everyone at home needs something slightly different, I often go for a compromise: lactose-free cottage cheese as the base, plus 1–2 spoonfuls of lactose-free yogurt or lactose-free sour cream for softness. It makes them more tender, and if you don’t overdo it, they still hold their shape.
A quick story from my own kitchen: one Sunday I was rushing and added too much yogurt “by eye” because I wanted them extra soft. Then I had to rescue the batter with flour—and the syrnyky came out more bready than I wanted. Since then I add any extra dairy by the spoonful, with a pause: add, mix, look.
Smart swaps that keep them tasting homemade
Syrnyky aren’t just cottage cheese. There are always a few small things that create that familiar smell and texture. If you’re adapting for lactose-free, it’s worth looking at the whole ingredient list—not only the cheese.
Eggs: keep them, but watch the size
Egg is your binder and your tenderness. But a large egg can make the batter too loose, especially if the cottage cheese is already moist. At home I often do this: mix the cottage cheese with half an egg (or one small egg), check the consistency, and only then decide if I need more.
Tip: if the egg is big and the cottage cheese is wet, sometimes just the yolk is enough. I save the white for an omelet or breading.
Sugar and sweetness: go easy with lactose-free dairy
Because lactose-free dairy can taste naturally a bit sweeter, you may want less sugar than in your usual version. I like syrnyky gently sweet, not full-on dessert-sweet. That way they work with berries, jam, or even something more savory—whatever your household is into.
One more thing: vanilla boosts the perception of sweetness. So it’s best to adjust sugar (or sweetener) and vanilla together.
Flour, semolina, starch: what gives the best texture
I’m not on a crusade against flour in syrnyky. You need some—it’s just about the amount. For lactose-free syrnyky, I more often use a combo: a little flour for structure + a little starch for tenderness. Semolina works too, but it needs time. Let it sit and swell, otherwise you’ll feel that grainy bite.
- Flour gives a more “bready” structure, but it holds shape well.
- Starch makes them softer and more tender, but too much can create a slightly “glassy” texture.
- Semolina adds springiness and juiciness—if you let the batter rest.
Butter, sour cream, yogurt—just lactose-free
If you’re used to adding a spoonful of sour cream or a bit of butter to the batter, you can keep that habit—just choose lactose-free versions. Lactose-free butter behaves like regular butter, but remember: extra fat makes the batter more tender and a little more crumbly. That’s great, just don’t overdo it if your cottage cheese is already soft.

Batter consistency: your real guide (not exact grams)
This is where I always stop people who want it “exactly like the recipe.” Syrnyky are like packing snowballs: the number isn’t the point—the shape holding is. The batter should be soft and a little sticky, but still something you can scoop and shape with a spoon or with hands dusted lightly with flour.
I go by three cues:
- Touch: springy, not runny, but also not stiff like modeling clay.
- Look: more matte than glossy—no shine from excess moisture.
- Behavior: drag a spoon through it and the line holds; it doesn’t immediately flood back in.
How to “dry out” cottage cheese without going overboard
The most common reason things go wrong is wet cottage cheese. The first instinct is to dump in flour. You can, but the result will be heavier. I prefer gentler fixes:
- let the cottage cheese drain in a sieve for 10–30 minutes;
- press it lightly with a spoon—don’t squeeze it into a dry lump;
- add starch or semolina and let the batter rest for 10 minutes;
- if it’s very creamy, replace part of it with a drier cottage cheese (another brand or different fat percentage).
Tip: I often take a “tea break.” Mix the batter—then while the kettle boils, the batter sits. Semolina/starch does its job, and you end up using less flour.
Resting the batter: a small thing that saves your nerves
When I worked in a high-volume kitchen, there was no time to rest batter—so technique had to compensate. At home, 10 minutes is realistic. In that time the mixture becomes more even, dry ingredients absorb moisture, and the syrnyky crack less and hold their shape better.
Shaping and frying so they don’t spread
Even perfect batter can be ruined in the pan. Syrnyky like calm: moderate heat, a properly preheated surface, and no poking every 20 seconds.
Pan temperature: let the sound guide you
I go by sound. When you place a syrnyk in the pan, you want a quiet, confident sizzle. If it’s screaming and turning dark in a minute, the heat is too high. If it sits there silently and starts “leaking,” the pan isn’t hot enough—or the batter is too wet.
Lactose-free syrnyky can brown faster, so I often cook them over medium or even medium-low heat, giving them time to warm through.
What to fry in: oil, butter, or a mix
If you love that buttery aroma, use lactose-free butter. But butter alone can burn. I often do a mix: a little neutral oil for stability + a small knob of butter for flavor. When the butter smells slightly nutty and gently sizzles, it’s go time.
Shaping: less flour on the outside = a more tender crust
I’ve watched people coat syrnyky like they’re breading cutlets. That creates a thick flour “jacket” that eats dry. I prefer a light dusting—just enough so they don’t stick to your hands or spatula, but not a heavy coat.
Tip: wet your hands with water or lightly oil them—then you’ll need less flour for shaping.
The oven as a safety net
If my syrnyky are on the thicker side, I sometimes do this: brown them quickly on both sides in the pan, then finish them in the oven. It removes the fear of “burnt outside, raw inside,” especially with lactose-free cottage cheese that can be a bit wetter.
Quick story: once I had a small child at home, I stopped trying to “read” syrnyky perfectly on the stovetop—because someone always needs something. The oven became my quiet partner: while I’m wiping up spilled juice, the syrnyky finish cooking calmly and don’t burn.

Common mistakes: why they turn rubbery, raw, or fall apart
No judgment here. I’ve stepped on all these rakes myself—especially when I was swapping ingredients to suit different guests. Syrnyky are simple, but they don’t love being rushed.
Mistake 1: too much flour “just to be safe”
Yes, they’ll hold. But they’ll also be dense and dry, and instead of tender syrnyky you’ll get something halfway between a bun and a fritter. If the batter is loose, try removing moisture first (drain in a sieve/cheesecloth, rest with semolina) instead of immediately adding more flour.
Mistake 2: heat too high
Dark crust on the outside, cold curds on the inside. Then you try to “cook them through,” and they dry out. Moderate heat and patience is genuinely half the win.
Mistake 3: the cottage cheese is too wet—and you didn’t give it a chance
If the cottage cheese is watery, it will “float” in the pan. You either drain it or switch brands/types. I’m not kidding: sometimes changing the pack solves more than any flour gymnastics.
Mistake 4: you keep flipping them
A syrnyk needs time to set. If you move it too early, it tears and crumbles, and then you start “saving” it with the spatula. My rule: place it and leave it alone until I see a clear crust around the edge and I can feel the bottom has firmed up.
Mistake 5: too many mix-ins
Raisins, apples, banana, nuts—delicious, but every add-in changes moisture and structure. If you’re just learning lactose-free syrnyky, make a basic batch first. Add “personality” later.

Flavor and serving, no drama: how to get that “wow”
There’s a myth that lactose-free automatically means “bland” or “not the real thing.” I don’t buy it. The “wow” in syrnyky usually isn’t the milk itself—it’s aroma, a proper crust, and that contrast of textures.
Aromas that make them taste homemade
- Vanilla — classic, just don’t overdo it or it turns perfumey.
- Lemon or orange zest — adds freshness, especially if your lactose-free dairy tastes a touch sweeter.
- Cinnamon — cozy, especially in winter.
- A pinch of salt — yes, even in sweet syrnyky. It makes the flavor feel fuller.
A small story: I once made syrnyky for a friend who really missed the “normal” ones. I added zest and a pinch of salt, and she said, “That’s it. Not a copy, but it’s mine.” That stuck with me. You don’t need a perfect duplicate—you need something that tastes good to you.
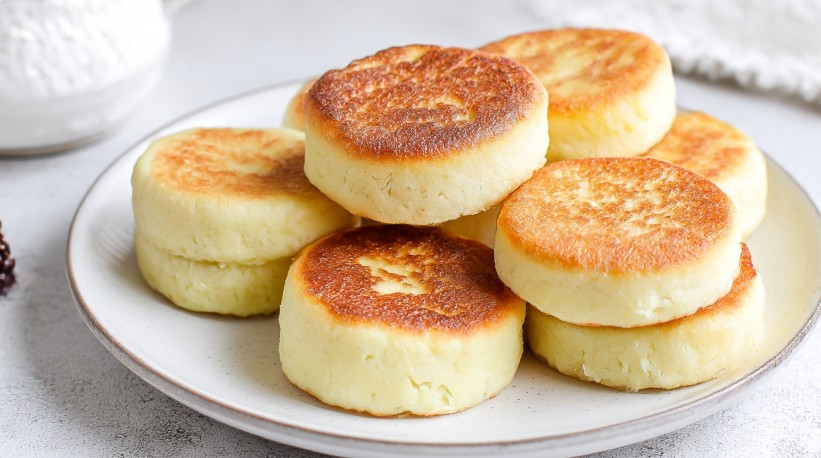
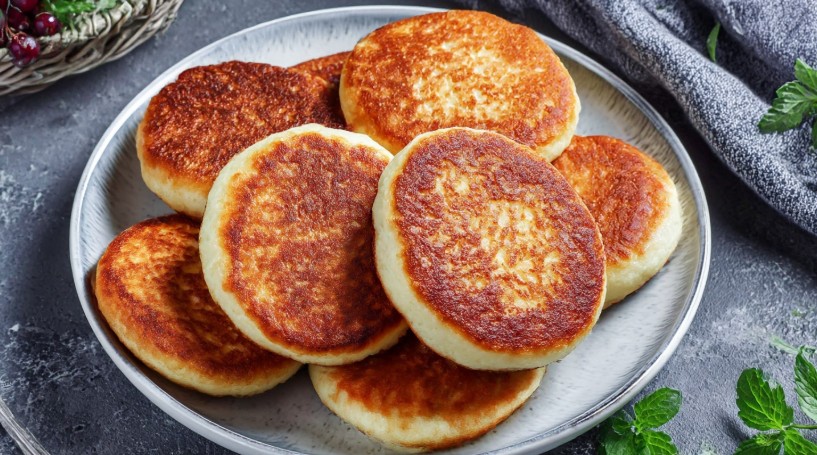
Texture: crisp edges + tender middle
That combo is why we love syrnyky. For a good crust you need two things: a properly heated pan and a bit of fat. For a tender middle: don’t dry the batter out with too much flour, and don’t scorch them with high heat. Simple—just not sloppy.
Serving for real life: work mornings, kids, and zero energy
I don’t romanticize mornings. Sometimes you’re making syrnyky between calls, school drop-off chaos, and hunting for the missing sock. So I like the “cook it, then build an easy plate” approach. Some people want berries, some want jam, some just want tea and peace.
If you’ve got kids at home, “sauce on the side” is often the move—everyone chooses their own topping. Fewer arguments, and it doesn’t feel like you’re cooking separate meals for everyone.

Habits over rules: fitting lactose-free syrnyky into real life
I like the idea that food should help you live—not become another exam. Cutting lactose doesn’t mean you now have to eat “perfectly.” It means you’re looking for your comfort and your balance.
I’ve watched people “fall off the wagon” not because they crave lactose specifically, but because they’re exhausted from constantly policing themselves. That’s why I’m a fan of small habits that remove the pressure.
Build yourself a simple “default kit”
Once you have a lactose-free cottage cheese you trust and a clear way to bring the batter to the right consistency, life gets easier. No need to reinvent the wheel every time.
- Pick 1–2 brands of lactose-free cottage cheese you genuinely like.
- Keep starch or semolina at home as “moisture insurance.”
- Have an aroma booster on hand (vanilla/zest) so the flavor stays reliably good.
Flexibility: when someone serves “regular” syrnyky
I’m not going to tell you what to do—everyone’s sensitivity and experience is different. But from a “kitchen psychology” point of view, one thing helps: don’t turn food into a drama. If you know you feel better without lactose, it’s useful to have a plan B—eat something else at the table, or bring your own version if that’s appropriate. Not as “I’m special,” but as “this is what works for me.”
A quick story: I once had a guest who was embarrassed to mention lactose issues and quietly suffered afterward. Next time, he simply brought his own cottage cheese. Nobody was offended. We actually laughed and called it a “cheese tasting.” Everyone relaxed.
Freezing: when you want to save time
If you’ve got the energy to make a bigger batch once, it can save your weekdays. I like freezing syrnyky either shaped and raw, or fully cooked (pan-fried). Later it’s a quick reheat, and breakfast doesn’t turn into a whole project.
Tip: freeze syrnyky in a single layer on a board first, then transfer to a bag. That way they don’t turn into one giant “syrnyky brick.”
Because lactose-free cottage cheese pancakes (syrnyky) aren’t about taking a favorite food away from yourself. They’re about making it friendlier to your body and your schedule. Once you find your cottage cheese, your batter consistency, and your stovetop heat, it becomes very ordinary—in the best way. Just a normal breakfast that leaves you feeling good.
What usually goes wrong for you with syrnyky—does the batter spread, does the crust burn, or is the middle not quite right? Tell me in the comments how you make yours—I love collecting these little kitchen observations.