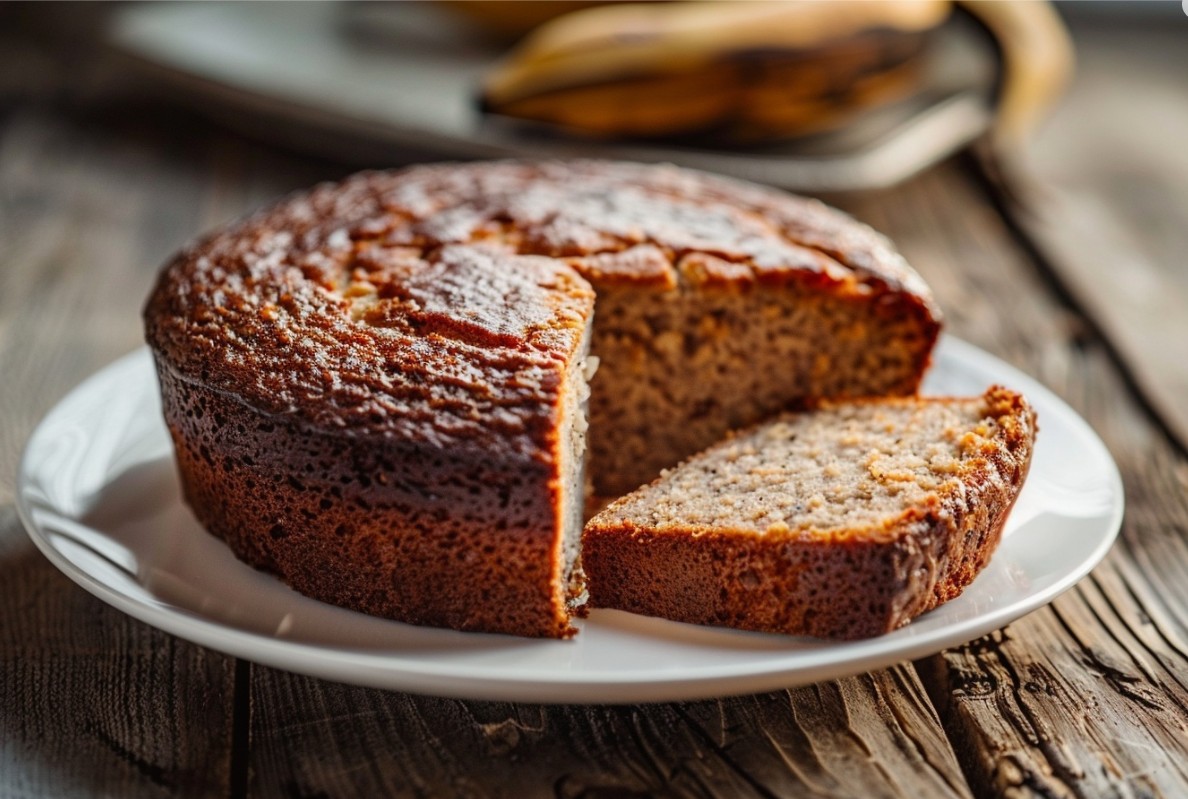
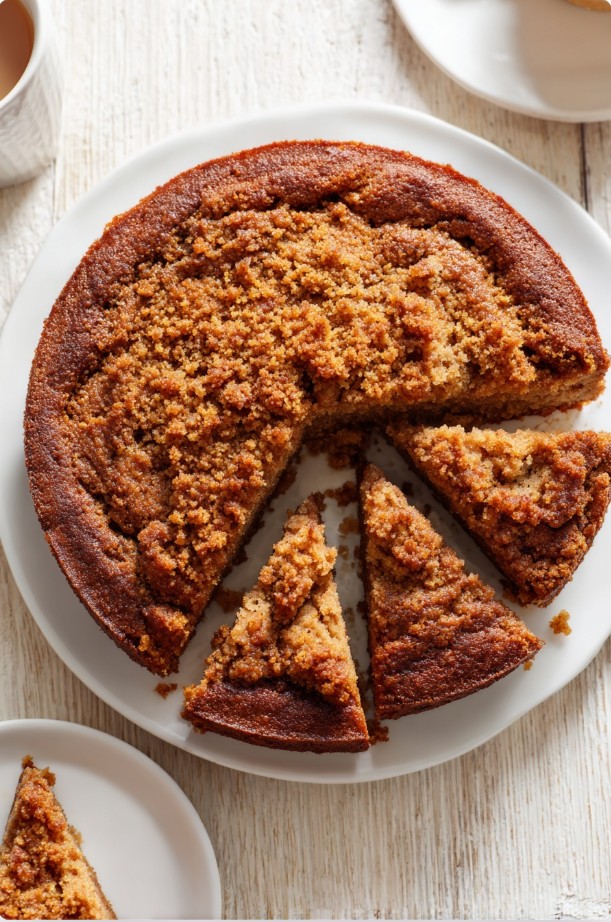
Skillet banana bread is my go-to when I want something home-baked but can’t be bothered to switch the oven on. The batter turns out soft, moist, and properly banana-y, and you get that satisfying round “loaf” shape because it cooks right in a regular frying pan under a lid. Bananas bring natural sweetness and moisture, while the egg and yogurt give it enough structure so it slices cleanly instead of crumbling everywhere. The only real rule: keep the heat below medium and don’t rush it. That’s how you end up with an evenly golden crust and a tender middle—no gummy, undercooked strip. With the lid on, the cake-bread rises calmly (no dramatic cracks), and you’ll start smelling the cinnamon in just a few minutes. Serve it warm, but let it sit for 10 minutes on a board after it comes off the heat—sounds fussy, but it helps the crumb set. Once it’s rested, it cuts into neat slices and holds together nicely, even if you toss in nuts or chocolate.
In this recipe, you’ll learn
- Why you’ll love this recipe
- Tips before you start
- What to look for when choosing ingredients
- Secrets to perfect skillet banana bread
- How to serve skillet banana bread
- Nutritional perks
- Recipe variations
- Questions & answers
- Common mistakes
Why you’ll love this skillet banana bread recipe
Want something homemade while the kettle’s still coming to a boil? This one moves fast where it should: mash the bananas in 2 minutes, then let the pan do the slow, steady baking under the lid. The texture stays moist and soft with a thin, delicate crust. Another bonus: it’s an easy batch to split between breakfast and an afternoon snack.
- No oven—just a frying pan
- Tender, moist crumb
- Natural sweetness from ripe bananas
- Minimal washing up
- Holds its shape nicely
- Great for snacking
Skillet Banana Bread
Ingredients
- 2 pcs Very ripe bananas about 220–250 g peeled
- 1 pc Egg room temperature
- 80 g Thick plain yogurt unsweetened
- 150 g Wheat flour you may need +10–20 g to adjust
- 30 g Sugar or to taste
- 0.5 tsp Baking soda
- 1 pinch Salt
- 1 tsp Ground cinnamon
- 1 tsp Neutral oil, for greasing refined
Equipment
- Heavy-Bottomed Skillet (22–24 cm)
- Frying Pan Lid
- Mixing Bowl (2)
- Spatula or Spoon
- Banana fork
- Parchment Paper (2)
- Skewer or Toothpick
Method
- Mash 2 very ripe bananas with a fork until smooth with no big chunks, then add the egg and yogurt. Mix for 1 minute until uniform. The mixture should be thick and glossy, like loose purée; keep the bowl away from the hot hob.
- Add the flour, sugar, baking soda, a pinch of salt, and cinnamon. Stir with a spatula for 1–2 minutes just until you don’t see dry flour. The batter should fall off the spatula slowly in a wide ribbon—not pour like crepe batter.If your bananas are extra juicy, add 1 more tbsp flour.
- Warm a heavy 22–24 cm frying pan over below-medium heat for 2 minutes. Place a circle of parchment in the pan and brush it with 1 tsp oil. As a temperature cue, aim for about
 180 °C (356 °F)—a drop of water should gently sizzle, not spit.
 - Spoon the batter into the pan in a layer about 2–2.5 cm thick. Smooth the top and cover with a lid. Cook on the lowest heat for 12–14 minutes, until the top looks matte and tiny pores appear; the edges should dry slightly and start to pull away from the parchment.
- Flip carefully: slide onto a plate, cover with the pan, and turn it back in, keeping the heat low—around180 °C (356 °F). Cook under the lid for 6–8 minutes until evenly golden. Worried about breaking it? Flip it together with the parchment.
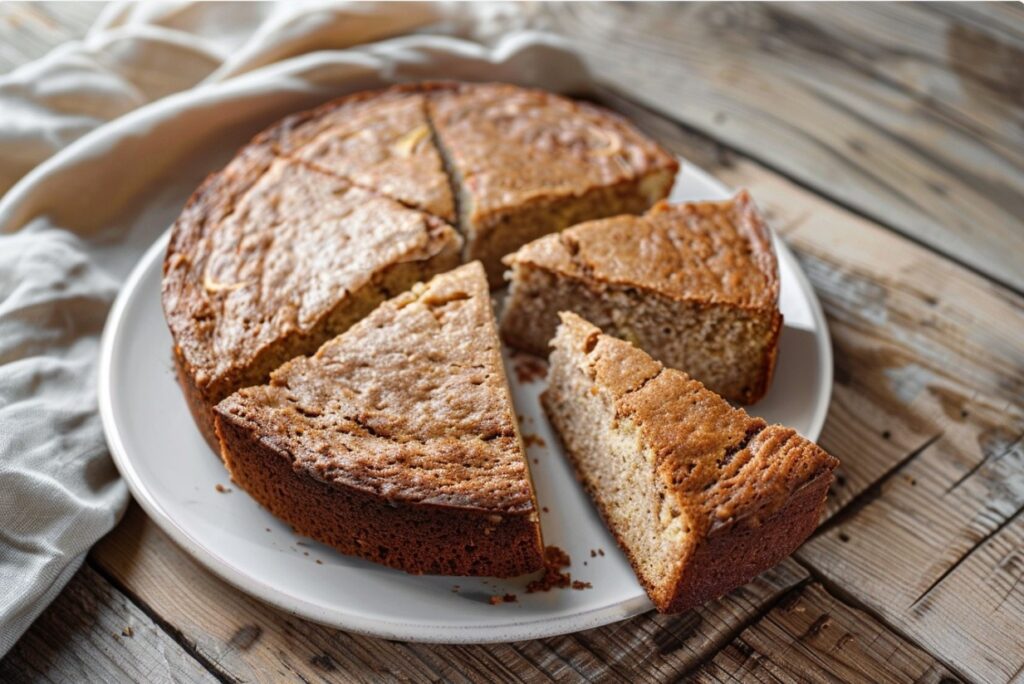
- Check doneness with a skewer in the centre: it should come out almost dry, with no wet batter, and the banana-cinnamon smell will be obvious. Remove from the pan and leave on a board, uncovered, for 10 minutes so the crumb sets and slices neatly.
Notes
Private Notes
Tried this recipe?
Let us know how it was!
Tips before making skillet banana bread
Thinking a frying pan can’t “bake” like an oven? It absolutely can—if you cover it with a lid and keep the heat below medium. A heavy 22–24 cm pan is the easiest to work with, plus a circle of parchment on the bottom. Let the batter sit for 5 minutes so the baking soda can do its thing evenly, and don’t lift the lid every minute—steam is part of the magic here.
- A thick-bottomed pan cooks more evenly
- Parchment on the bottom makes flipping easier
- The lid should fit snugly
- Heat below medium—no shortcuts
- Cool for 10 minutes before slicing
What to look for when choosing ingredients for skillet banana bread
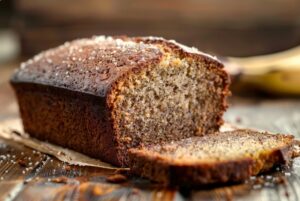
Ripe bananas are the whole point—pick the ones with lots of brown speckles for the best flavour (and the easiest mashing). For yogurt, go for thick, plain, unsweetened; it keeps the crumb tender without turning the batter runny.

Bananas
Use 2–3 very ripe ones; if they’re still firm, leave them in a paper bag for 1–2 days.
Wheat flour
Sift once so the batter stays lighter and lump-free.
Plain yogurt
Thick, 2–5% fat: a thinner kefir-style drink will usually need extra flour.
Baking soda
Stick to exactly 1/2 tsp; too much can taste soapy.
Cinnamon
Ground cinnamon with a fresh smell; add a pinch of nutmeg if you feel like it.
Secrets to perfect skillet banana bread
The key is about 180°C—and on the stovetop that basically means steady low heat with the lid on. The bottom should only gently sizzle; if it’s aggressively frying, the crust will burn before the centre cooks through. Flip only once the top has dried out and stopped looking shiny.
- Low heat + a lid
- A parchment circle on the bottom
- Thick batter that doesn’t pour
- Flip only after the top dries out
- Rest for 10 minutes after cooking
How to serve skillet banana bread
On a lazy weekend morning, slice it up and put it on the table while the coffee’s still hot. Later in the day it’s also a handy “quick dessert for friends” situation—especially when you’ve got about 10 minutes to make it look like you planned ahead.
- With butter and a tiny pinch of salt
- With Greek yogurt and honey
- With peanut butter and extra banana
- With berries and a dusting of cinnamon
- Toast in a dry pan for 1 minute per side
Nutritional perks of skillet banana bread
With bananas, egg, and yogurt in the mix, it’s a more filling snack than plain biscuits. It’s especially handy if you’re on the go and want something you can slice into portions—no frosting, no fuss, no mess.
- A source of carbs for energy
- A bit of protein from the egg and yogurt
- Fibre from bananas
- Satisfying without heavy creams
Skillet banana bread variations
If you want a different vibe, change the add-ins but keep the batter thickness the same. For a lactose-free option, use lactose-free yogurt or a thick plant-based yogurt—just watch the consistency: it should sit up on a spoon and not run.
- Chocolate version: 1 tbsp cocoa powder
- Nutty: 40 g walnuts, roughly chopped
- Berry: a handful of blueberries, tossed in flour
- Lactose-free: lactose-free yogurt
- Spiced: a pinch of ginger + a pinch of nutmeg
Questions & answers
Once a guest asked for the recipe basically at the door—because they genuinely didn’t believe you could make banana bread without an oven.
Як зрозуміти, що банановий хліб на сковороді готовий?
Верх матовий і пружний, краї відходять від стінок, а шпажка з центру виходить майже сухою. Якщо є трохи вологи — дай ще 3–5 minutes на мінімальному вогні під кришкою.
Чому потрібно перевертати корж?
Нагрів іде знизу, тому перевертання вирівнює пропікання і дає рум’яність з обох боків. Без перевертання верх може лишитися блідим і сирішим.
Що робити якщо тісто вийшло занадто рідким?
Додай 1–2 ст. л. борошна й перемішай 10–15 секунд, щоб маса стала густою й повільно сповзала з ложки. Далі готуй на нижчому вогні трохи довше.
Скільки зберігається і як підігрівати?
У контейнері 2 доби при кімнатній температурі або до 4 діб у холодильнику. Підігрій на сухій сковороді на мінімальному вогні по 30–40 секунд з кожного боку.
Common mistakes when making skillet banana bread
My first attempt was a bit of a disaster: burnt bottom, raw middle—because I cranked the heat “to make it faster.” In a pan, heat comes from below, so the batter needs time and a lid, otherwise the steam can’t finish cooking the top. Another trap is batter that’s too loose (extra-large bananas or thin yogurt). A small flour adjustment saves it, but don’t overdo it or you’ll end up with a rubbery crumb.
Why is the bottom burning while the top is still raw?
The heat is too high or the lid doesn’t fit tightly. Lower it to below medium, use parchment, and cook longer with the lid on.
Why doesn’t it rise?
Your baking soda may be old, or you mixed the batter until it went “smooth and rubbery.” Use fresh baking soda and stir only until the dry flour disappears.
Why is the centre sticky after cooking?
You flipped too early or took it off too soon. Let it cook under the lid; look for a dried-out top and a mostly dry skewer in the centre.
Why does it crumble when I slice it?
You sliced it while it was too hot, or it needs a bit more binding. Wait 10 minutes, slice with a serrated knife; if needed, add 1–2 tbsp more yogurt next time.


Responses