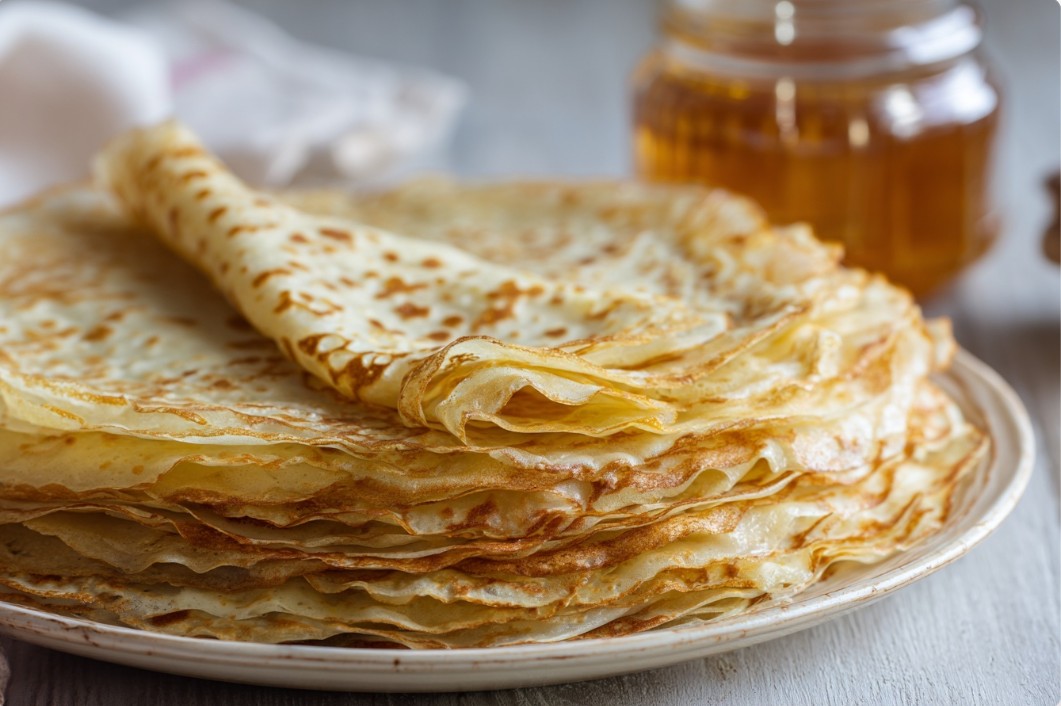
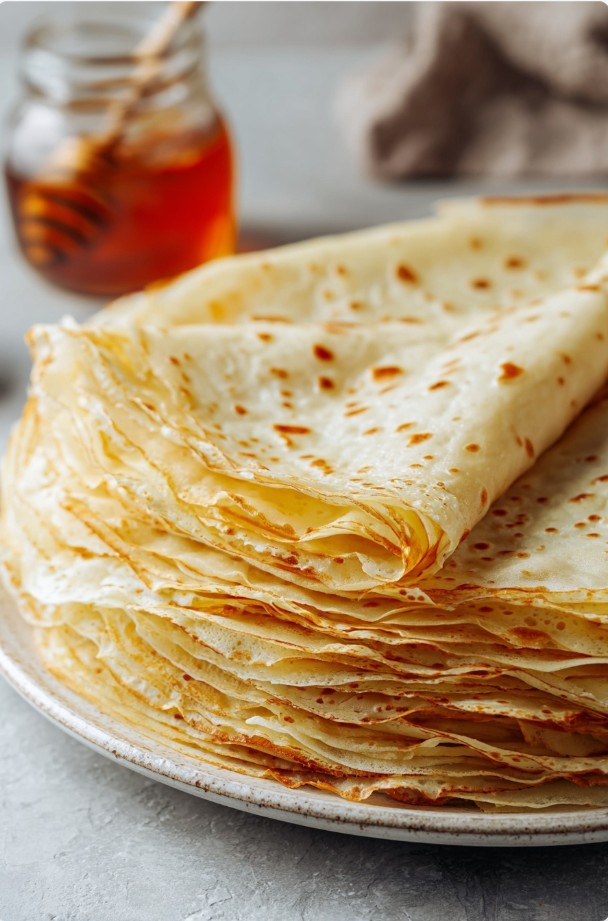
These classic Ukrainian crepes are one of those recipes that just sticks with you. The first time I remember eating them was at my grandma’s kitchen table—proper weekend breakfast vibes, a warm pan on the stove, and that sweet, milky smell that somehow fills the whole house. Her method was simple, but the little details mattered, and I still make them the same way. The crepes turn out thin, soft, and lightly golden, ready for whatever you’re in the mood for—honey, jam, berries, or something a bit more indulgent.
In this recipe, you’ll learn
- Why you’ll love this recipe
- Tips before you start
- What to look for when choosing ingredients
- Secrets to perfect classic crepes
- How to serve Classic Ukrainian Crepes (No-Fail Recipe, No Surprises)
- Nutritional perks
- Recipe variations
- Questions & answers
- Common mistakes
Why you’ll love this classic crepes recipe
It’s straightforward, reliable, and works for pretty much any day of the week. I make these crepes for breakfast, a quick lunch, or even a lazy dinner when I want something comforting. They’re neutral enough to go sweet or savoury, which is exactly why they never get old.
- quick, easy process
- works with loads of different fillings
- brilliant with honey
- great with fresh berries

Classic Ukrainian Crepes (No-Fail Recipe, No Surprises)
Ingredients
- 250 г Flour high-grade/plain wheat flour
- 500 мл Milk room temperature
- 3 шт. Eggs fresh
- 2 ст. л. Sugar to taste
- 4 ст. л. Oil for frying
Method
- In a large bowl, combine 250 г flour, 2 tbsp sugar, and 1 tsp salt. Mix well so everything is evenly distributed and you don’t end up chasing lumps later.
- Add 3 eggs and 500 мл milk to the flour mixture. Whisk until smooth and lump-free—this makes frying so much easier.
- Let the batter rest for 20 minutes so the gluten can relax and the texture improves. You’ll get more tender, more flexible crepes.
- Heat a frying pan over medium heat and lightly grease it with oil. Give it a couple of minutes to properly warm up.
- Pour about 1 ladle of batter into the pan, swirling to coat the surface in a thin layer. Cook for 2–3 minutes, until you see bubbles and the edges start to look set.
- Flip and cook for another 2–3 minutes, until golden. Transfer to a plate.
 Repeat with the remaining batter, greasing the pan with a little oil before each crepe so nothing sticks.

Notes
Private Notes
Tried this recipe?
Let us know how it was!
Tips before making classic crepes
A tiny bit of prep makes a big difference here. Start with room-temperature eggs and milk—they blend more smoothly and help you avoid stubborn lumps. And don’t skip the rest time: letting the batter sit gives you more tender, flexible crepes that are easier to flip.
- use fresh ingredients
- let the batter rest (it’s worth it)
- keep an eye on pan temperature
- play around with fillings
What to look for when choosing ingredients for classic crepes
With a short ingredient list, quality really shows. Milk and eggs do most of the heavy lifting—they’re what give these crepes that soft texture and gentle aroma. I like using a higher-fat milk for a richer taste, but use what you have.
Flour
Go for plain wheat flour (high-grade/finely milled) so the crepes stay light and thin.
Milk
Fresh and at room temperature helps everything mix quickly and evenly.
Eggs
Eggs add structure and tenderness. If you’ve got good-quality eggs, you’ll taste it.
Sugar
A little sugar rounds out the flavour—adjust to taste depending on your toppings.
Oil
Helps prevent sticking. Sunflower oil is classic, but olive oil works too.
Secrets to perfect classic crepes
After making these more times than I can count, a few things really stand out. Resting the batter for at least 20 minutes helps with texture and prevents tearing. And here’s the funny part: once your pan is seasoned and behaving, you often only need to oil it before the first crepe (then add more only if it starts to stick).
- rest the batter before frying
- oil the pan before the first crepe (then as needed)
- cook over medium heat
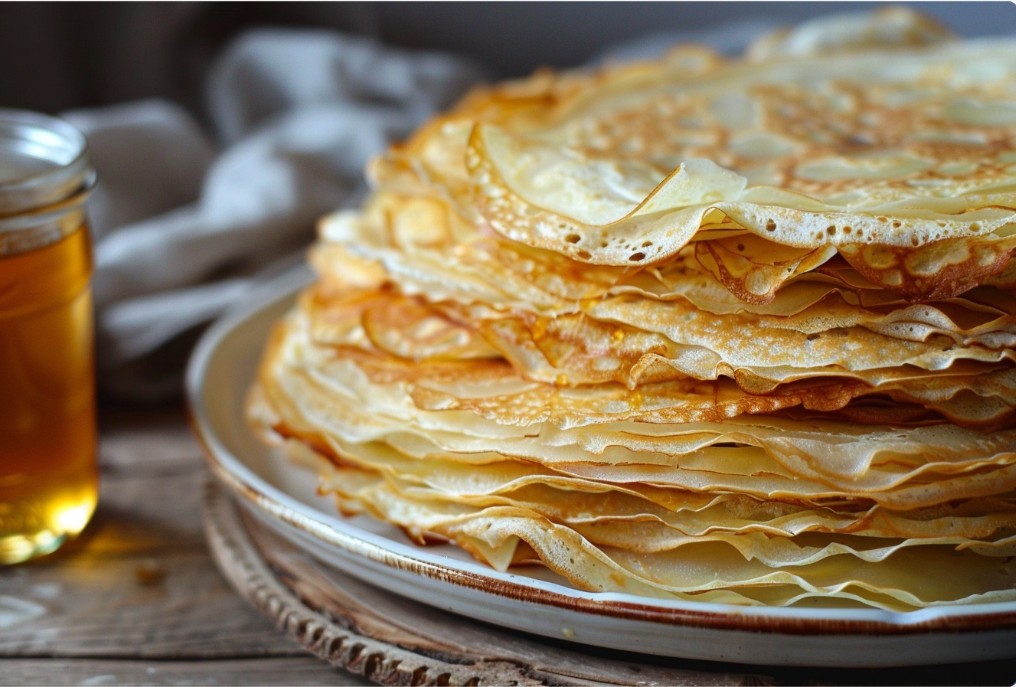
How to serve Classic Ukrainian Crepes (No-Fail Recipe, No Surprises)
Classic crepes are all about toppings. Keep it simple with honey or jam, pile on fresh berries, or go the creamy route with sour cream (very Ukrainian and very good) or plain yogurt.
- with honey
- with jam
- with berries
- with sour cream
- with yogurt
Nutritional perks of classic crepes
Crepes can absolutely fit into a balanced day—especially when you pair them with more nourishing toppings. They bring carbs for energy, and if you add fruit or yogurt, breakfast starts looking a lot more well-rounded.
- provide useful carbohydrates for energy
- help keep you going through the morning
- easy to pair with fruit
Recipe variations for classic crepes
This batter is a great base for tweaks. Add a little vanilla for a sweeter aroma, or a pinch of cinnamon for warmth. If you want to go savoury, you can even mix in some finely chopped spinach or a bit of grated cheese.
- vanilla crepes
- savoury spinach crepes
- chocolate crepes
- apple crepes

Questions & answers
A few questions come up all the time when people make crepes for the first time (or the tenth). Here are the quick answers that’ll save you a bit of trial and error.
Can I use gluten-free flour?
Yes, but you may need to adjust the proportions a little.
Can I store crepes?
Yes. Keep them in the fridge for up to 3 days.
What toppings work well with crepes?
Try fresh fruit, jam, or honey.
Common mistakes when making classic crepes
Crepes are simple, but they’re picky about a couple of things. The biggest issue is a pan that’s too hot—then they brown too fast and can burn before they set. Another common one: adding too much flour, which makes the crepes thick and a bit tough.
Why are my crepes burning?
Check the heat—your pan shouldn’t be screaming hot. Medium heat is your friend.
Why are my crepes thick?
You likely added too much flour. Stick closely to the measurements, especially the first time.
Why are my crepes tearing?
Let the batter rest so the gluten can relax and the crepes hold together better.


Responses