How to Plate Tuna Salad for Guests
Honestly, even the simplest tuna salad can look restaurant-worthy — it all comes down to how you serve it. Not fancy plates or complicated techniques, just the little things: shape, layers, color, and a bit of neatness.
When friends come over, you don’t really want to plop a bowl on the table and call it a day. You want something that catches the eye right away. The good news: it doesn’t take much time. A few simple tricks can completely change how your salad looks.
It happens like this: you make tuna salad on autopilot. Tasty, filling, familiar. And then — guests. Suddenly the thing that normally lives in a “family-only” bowl needs to look nice: tidy, appetizing, like you actually planned it… not like you threw it together at the last second.
That’s where a lot of people freeze up. “Plating” sounds like a restaurant thing: rings, tweezers, microgreens, sauce dots. Plus there’s the fear that you’ll touch it and it’ll collapse, smear, turn into mush. Been there.
In reality, tuna salad is incredibly forgiving for presentation. It has texture, it has color, it can hold its shape, and it’s easy to “build” so it looks festive — without drama and without special tools. The key is understanding what actually makes a salad look good: not decorations, but structure, contrast, and a clean plate.
I’m going to share the approach that’s saved me dozens of times: when time is tight, the kitchen is basic, but you still want guests to say, “Wow, that looks great,” and immediately reach for a fork.
Where a beautiful presentation really starts: not with garnish, but with logic
When people think about presentation, they often start with “What can I garnish it with?” I start with a different question: what shape and structure does this salad have? Because if it looks like one uniform mass, no sprig of parsley is going to save it. And the other way around: if you can see clear layers/cubes/crumbly bits, it already looks put-together — even without any extra flourishes.
Tuna salad can swing from soft and almost creamy (when everything is finely chopped and bound with dressing) to more “salad-like” (when you can actually feel the pieces). For guests, I like the middle ground: it holds its shape, but it’s not dry.
Three things that make it look “expensive” even at home
- Contrast: light/dark, matte/glossy, crunchy/soft. Tuna is naturally matte and mellow — it needs a partner that makes it pop.
- Breathing room: don’t fill the plate to the edges. A little empty space around the food instantly looks more polished.
- Clean edges: the easiest “restaurant” trick. A clean rim tells your brain “this is neat.”
A quick story from my kitchen: I once made a salad for a birthday in an apartment where the only tools were a knife and a teaspoon. Still looked great. Why? I spent two minutes wiping the rim and plating it in a defined shape instead of dumping it like it was still in the mixing bowl. Everyone assumed I’d “gone all out.” I just didn’t rush two small steps.
If you’re not sure what to do for garnish, start by fixing the shape and cleaning the rim. That’s 80% of the effect.
Texture and moisture: why a salad either holds its shape or turns watery
Plating tuna salad isn’t “pretty for the sake of pretty.” It’s physics. If the salad is too wet, it spreads, leaves puddles, and loses definition. Too dry, and it looks crumbly and a little sad — and tastes like you forgot the dressing. Balance is everything here.
In a home kitchen, the most common issue is simple: we mix everything at once, including the ingredients that release water. Then we’re surprised when the salad turns runny 15 minutes later.
What adds “water” to tuna salad
- high-moisture vegetables (cucumber, tomato, and sometimes even onion if it’s very juicy and you use a lot);
- tuna if you don’t drain it well (especially tuna in brine/its own juices);
- too thin a dressing — or simply too much of it;
- salt added too early: it pulls moisture out of vegetables.
How I make sure it holds its shape for a nice presentation
Tip 1: if the tuna comes with liquid, I give it 2–3 minutes in a sieve, or I press it against the side of the can with a fork and pour off the excess. The goal isn’t to dry it out — just to remove what will later become a puddle on the plate.
Tip 2: anything that can release juice, I either add at the end or prep separately: chop it, then pat it dry with a paper towel. It’s not “extra.” It’s 20 seconds that gives you control.
Tip 3: add dressing gradually. Better to add a spoonful and mix than to create a mayo ocean in one go. For plating, you want the salad to be cohesive, but not coated in a greasy sheen.
One more thing people forget: temperature. Straight from the fridge, the salad is firmer and holds shape better. If it sits in a warm kitchen, the dressing loosens and everything softens. Not a disaster — just keep it in mind: for shaping portions, slightly chilled salad is ideal.
Serving style: individual portions vs. a centerpiece bowl — and how it changes the look
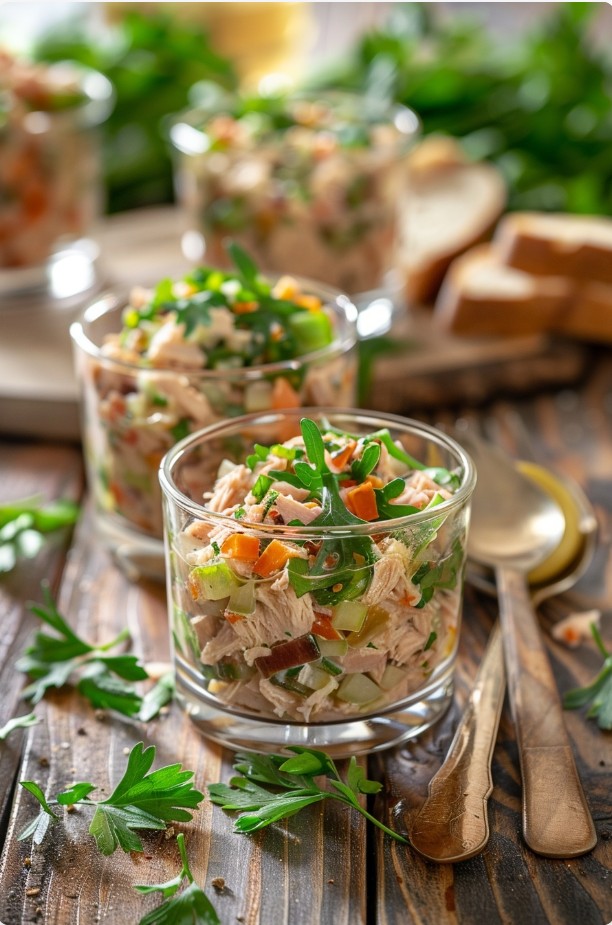
Before you “decorate” anything, decide one simple thing: are you serving the salad family-style in a bowl, or portioned onto plates? For guests, I often go with individual portions — even if it’s the exact same salad. Portioning automatically feels more special because everyone gets their own little composition.
That said, a shared bowl can look gorgeous too — as long as you avoid the classic mistake of dumping it in “as is.”
Individual portions: when you want “wow” without the fuss
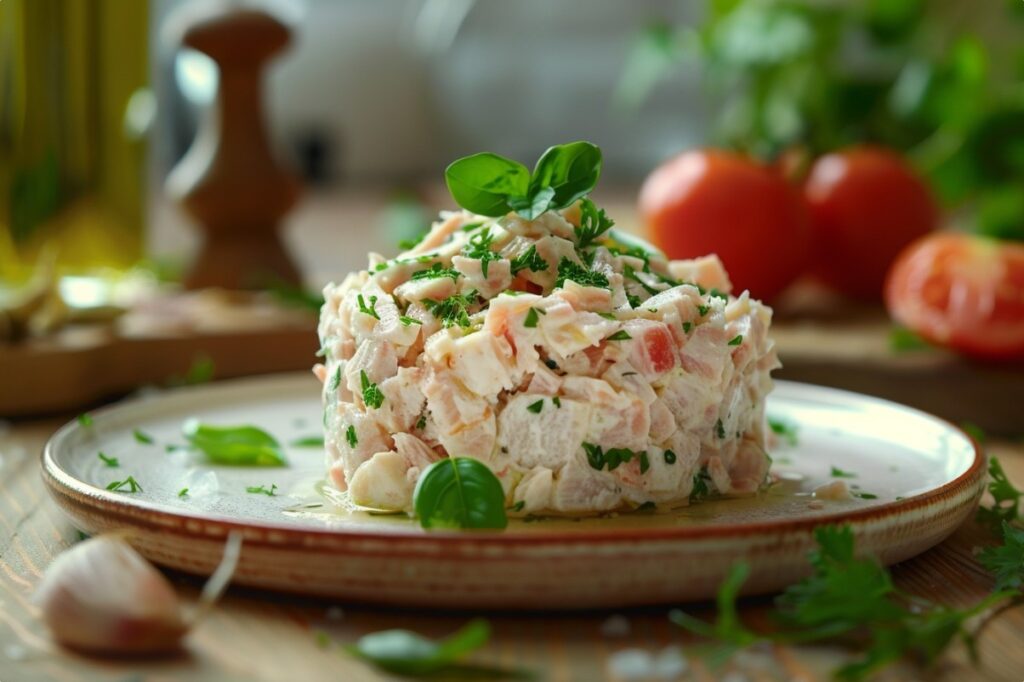
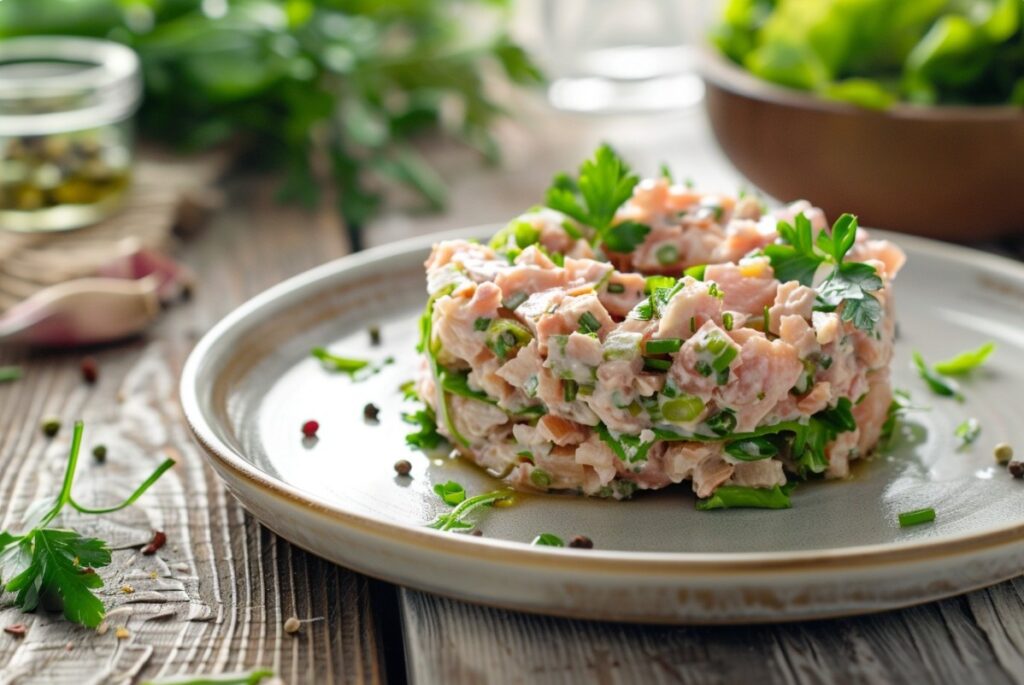
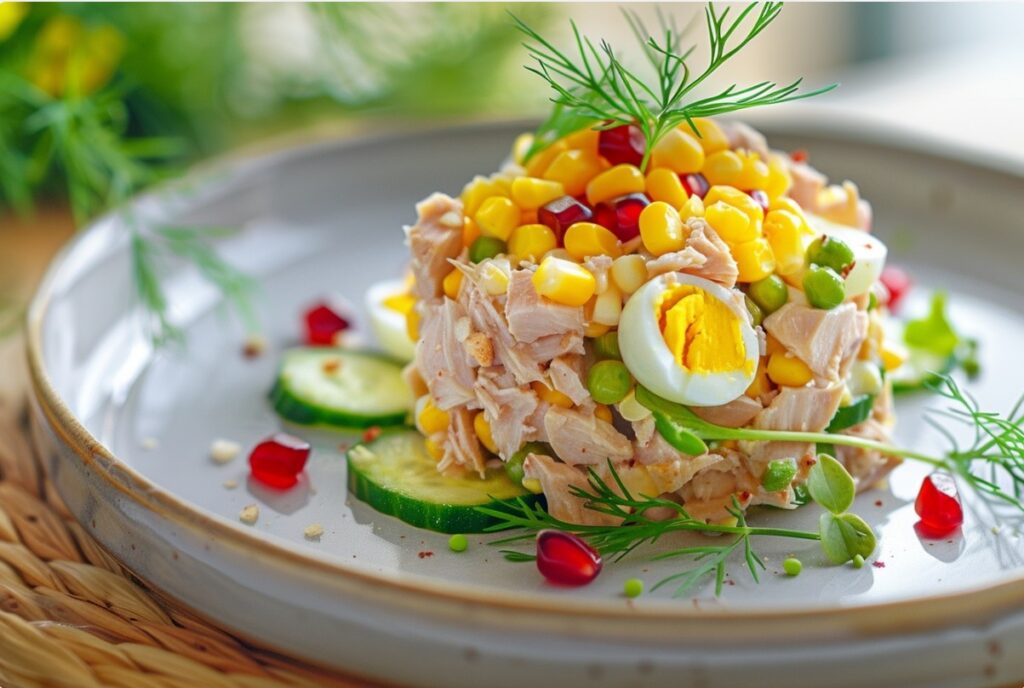
The easiest route is to create a neat, low mound in the center of the plate. Not a sky-high pile — just a tidy shape you can see from all sides. Anything round can act as a mold: a small bowl, a cup, even a straight-sided glass (if you shape it on the plate and lift it off).
Tip 4: if you’re making a “ring” without an actual ring, lightly grease the inside of the bowl with a drop of dressing or just dampen it with water — the salad releases more easily. Or line it with plastic wrap if you want a super clean edge.
Quick story: once I had nothing to shape the salad with, so I used… a tiny dipping bowl. Packed the salad in with a spoon, flipped it onto the plate — and got a perfect little “puck.” Everyone thought it was a special technique. It was just a bowl.
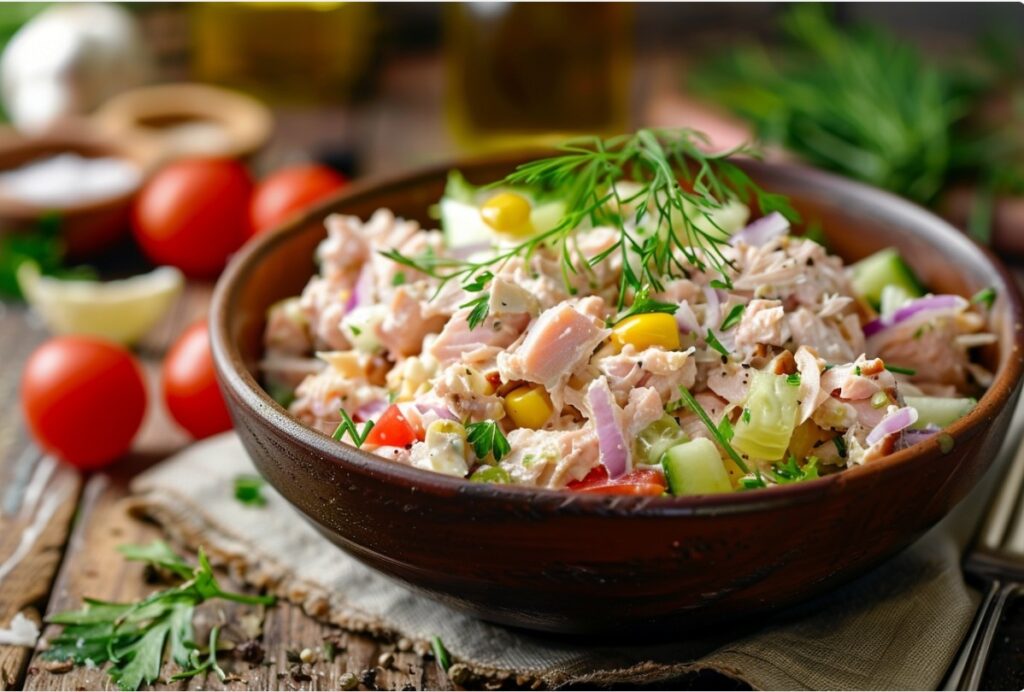
Family-style serving: how to make a bowl look party-ready
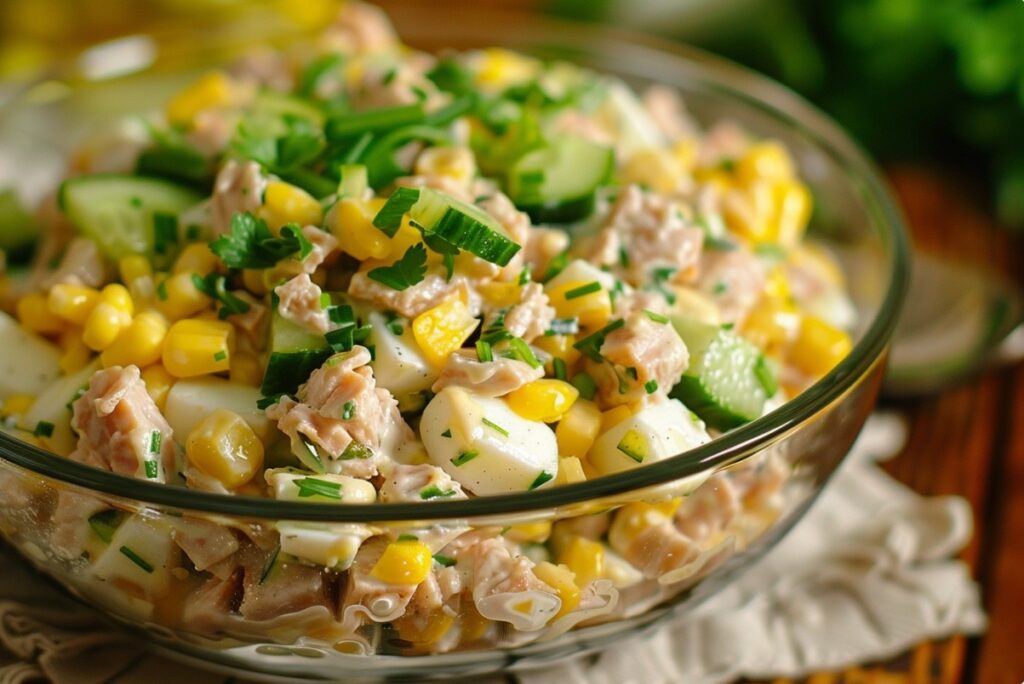
If the salad sits in the center of the table, you have two jobs: make it look full and dimensional, and make the top look finished.
- Don’t smear the salad into a thin layer in a wide bowl. A smaller bowl with more height looks better.
- Make the top look intentional: smooth it, add gentle spoon swirls, or create a clean circular line.
- Leave 1–2 cm of clean rim on the bowl. Tiny detail, huge upgrade.
For family, I don’t always bother. For guests, I always spend the 30 seconds on the rim and the top — and it changes everything.
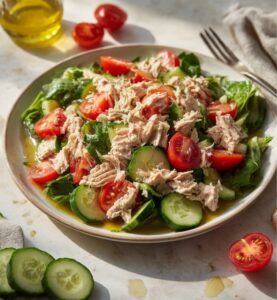
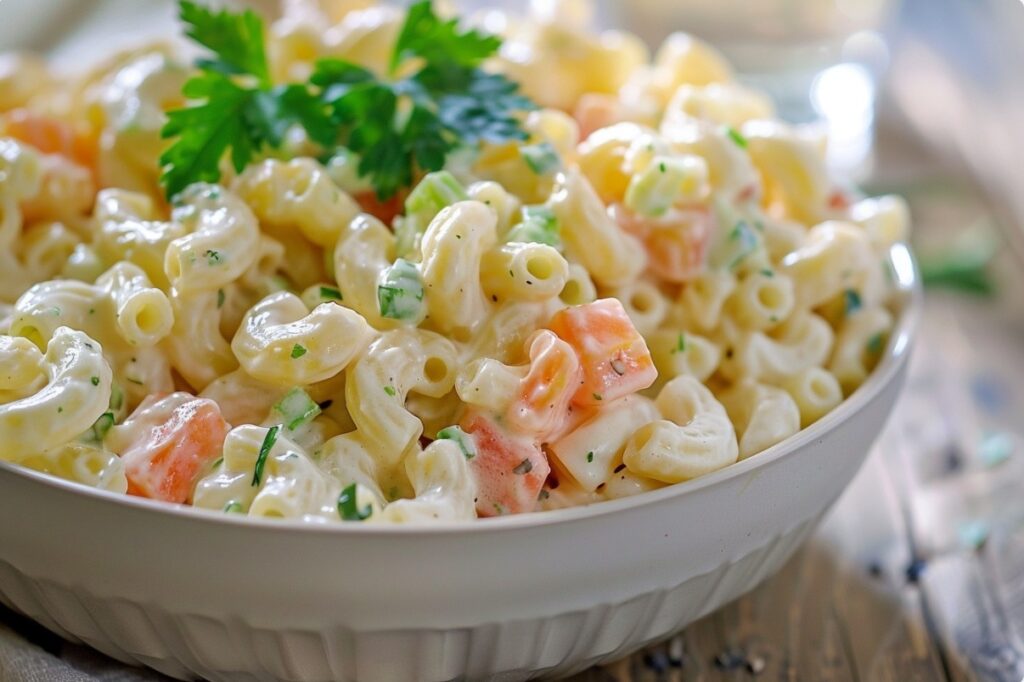
Color and contrast: how to make tuna salad look more appetizing
Tuna is a great ingredient, but visually it’s calm: beige-gray and matte. If everything around it is similar (think egg + potato + mayo), the salad turns into “one color.” Delicious? Sure. But on the table (and in photos) it disappears.
So I always think in three colors when plating: a base (the salad itself), a light accent, and a bright accent. No need for anything exotic — often it’s stuff you already have.
The contrasts that work best (and why)
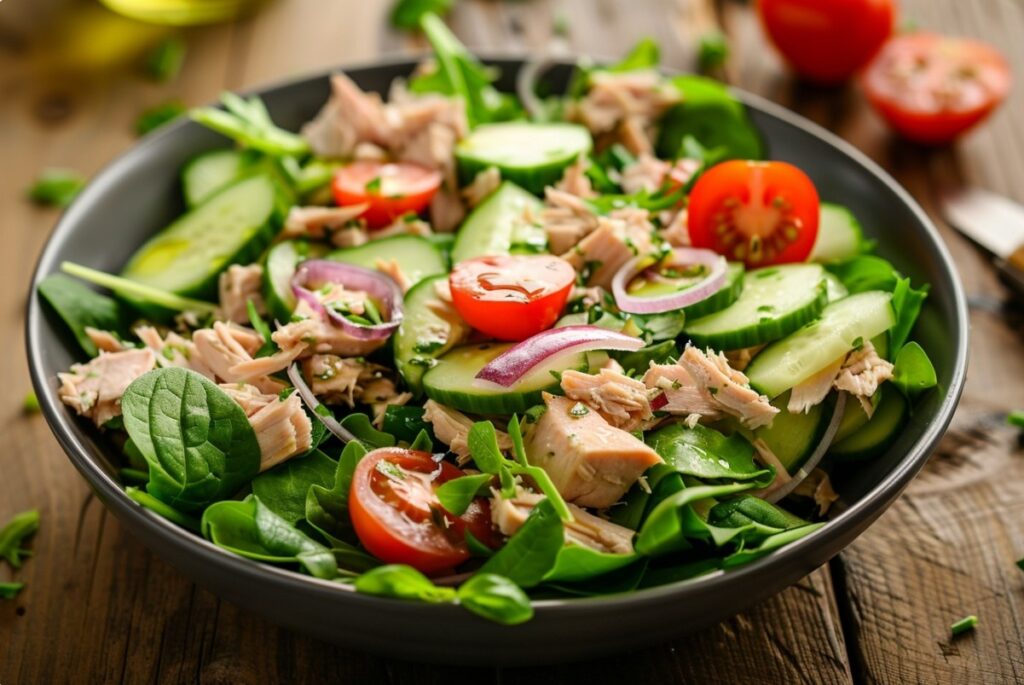
- Green (herbs, leafy greens, cucumber, scallions): reads as freshness. Your brain interprets green as “just chopped.”
- Yellow/orange (egg yolk, corn, sweet pepper): warms everything up and adds a sunny feel — especially helpful when the base is pale.
- Red/pink (tomato, radish, a little red onion): creates a focal point. Don’t overdo it — it should be an accent, not a red takeover.
- Dark (olives, capers, a bit of black pepper): adds depth. Dark dots on a light background always look sharp.
One simple plate scheme
Think of a “center” (the salad) and a “frame” (what’s around it). If the salad is light, the frame can be darker or greener. If the salad is already colorful, keep the frame neutral.
Tip 5: if you’re unsure about color, add herbs not inside the salad, but on top or to the side. They won’t get dulled by the dressing, they stay bright, and they instantly read as garnish rather than a random ingredient.
Quick story: I once made a tuna salad that tasted amazing but looked gray. I was ready to give up. Then I added a few thin half-moons of red onion and a little greenery on top — and suddenly it looked alive. Same flavor, totally different impression.
Plating composition: height, layers, and “focal points”
People eat with their eyes first. A salad with a bit of height and readable details seems tastier before the first bite. Not magic — just psychology. When it looks like it was assembled, not dumped, it feels more trustworthy.
Height: how to add volume without building a tower
Moderation matters. Too tall and it’s wobbly (and awkward to serve). Too flat and it looks everyday.
I like about 3–5 cm of height for individual portions. It looks neat and doesn’t intimidate anyone.
How to get there: don’t smear with a spoon. Add the salad in a couple of scoops to the center, gently press the top to level it, then do one clean smoothing pass around the sides to tidy the “walls.”
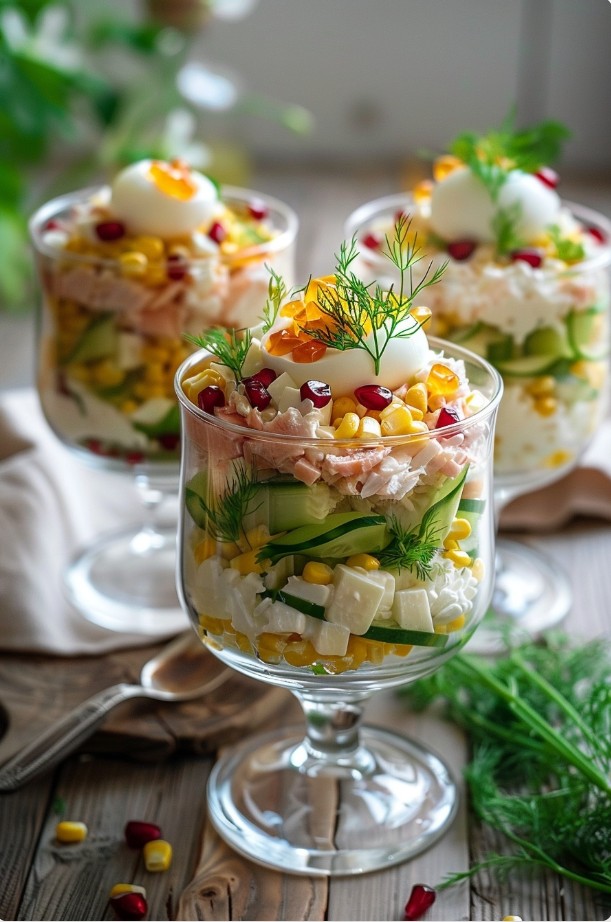
Layers: when they work — and when they make it worse
Layers can look impressive, but only if you can actually see them. If everything is the same color and texture, layers won’t add much — it’ll just be “the same salad twice.”
They work when there’s contrast: a light base with something brighter on top, for example. Just don’t turn it into a cake you have to slice. Salad should feel easy.
Tip 6: want the layered look without the risk? Do a “pseudo-layer”: the main salad goes in the center, and on top you add a thin layer of something contrasting (not watery!) or a few little “islands.” It looks intentional without requiring perfect geometry.
Focal point: one accent instead of ten
The most common garnish mistake is trying to add everything: herbs, egg, olives, tomato, and then something else. The result is visual chaos — your eyes don’t know where to land.
Pick one main “pretty” detail and let everything else support it. That can be a few slices on top, a neat sprinkle, a small wreath around the edge, one bright pop of color.
I often do this: the salad stays neutral, and on top I place 3–5 elements symmetrically or in a circle. Not because it’s “the rule,” but because it reads instantly.
Garnish without the drama: what to add so it feels festive, not theatrical
The word “garnish” makes some people roll their eyes — like you’re about to carve carrot flowers. I’m not into that either. I like garnish when it’s edible and makes sense for the flavor.
So I treat garnish as finishing touches: something crunchy, something fresh, something aromatic — all in small amounts.
Finishing touches that almost always work
- Freshly ground black pepper: adds dark specks and aroma. The key is a light dusting, not a pepper blanket.
- A few drops of oil or dressing on top: adds a little shine. Only if the salad isn’t already heavy.
- A pinch of zest (when it fits your flavor profile): you smell it before the fork even hits the plate.
- A crunchy element (crumbs, croutons, seeds): makes it visually interesting and adds sound — yes, sound matters. Crunch makes food feel fresher.
- Herbs — not a handful, but small tufts or leaves so they look alive.
How to place garnish so it looks tidy
Two simple layouts that rarely fail:
- A circle: garnish as a frame. Works great when the salad is centered. Festive and structured.
- Three points: imagine a triangle on the surface and place three matching accents. It’s a very human way to “design” without thinking like a designer.
Quick story: I once decorated a salad right before friends arrived and got the urge to add more and more. I stopped, removed half, left three clean accents — and it looked ten times better. The hardest part of garnish is knowing when to stop.
One clear accent and a clean plate beats ten tiny decorations that look like “whatever I found in the fridge.”
Common beginner mistakes: why a salad looks “homemade” in the not-so-good way
I love home cooking, and “homemade” can absolutely be a compliment. But sometimes it means messy, heavy, and shapeless. Here are the mistakes I see most often — and they’re easy to fix.
Mistake 1: everything is chopped too finely and mixed into one uniform mass
When everything is cut the same tiny size, the salad turns into a paste. It can taste great, but it looks like a spread. For guests, it’s better if at least some elements have a visible size and shape.
Better: mix scales. Keep the base a bit finer, then add something on top in larger pieces or slices so your eyes can read the structure.
Mistake 2: too much dressing
The most common reason a salad turns watery. Dressing should bind, not drown. If it shines like it’s been sauced, it looks heavy.
Better: the salad holds together, but there’s no puddle on the plate. When you drag a spoon through it, the mass moves as one instead of oozing apart.
Mistake 3: garnish made from the same ingredients as the salad — so nothing stands out
If your salad already contains, say, egg, and you top it with more egg, it doesn’t always work as garnish. Garnish should either contrast or emphasize the shape — otherwise it disappears.
Better: top with something that brings a different color/texture/shine.
Mistake 4: messy plate or bowl rim
It’s small, but it kills the whole impression — especially with a light-colored salad, where every smudge shows.
Better: before serving, wipe the rim with a napkin. I do it automatically now — like putting the salt back.
Mistake 5: straight from the fridge to the plate with no pause
When a salad is ice-cold, the aroma is muted. Let it “wake up” at room temperature (literally 10 minutes) and the flavor becomes more expressive. Just don’t leave it out for an hour.
Better: if you have time, take it out in advance so it’s not freezing. But shape portions while it’s still cool — it behaves better.
What to do when things go wrong: the salad falls apart, gets watery, or just looks off
Presentation isn’t an exam. Even I’ve had moments where I’m plating, step back, and… something’s not right. The good news: most issues can be fixed in 2–3 minutes if you know what to look for.
The salad is “swimming” and leaving liquid
Usually it’s either excess liquid from the tuna/vegetables or too much dressing.
- Transfer the salad to a sieve for 1–2 minutes (no need to overdo it) and let the excess drain.
- Or add something that can absorb a bit of moisture without ruining the flavor: a pinch of crumbs/a dry element that fits your idea. Just don’t turn it dry.
- For serving, use a deeper plate or bowl so any liquid doesn’t spread across a wide surface.
And one more thing: don’t salt the finished salad on top if it contains lots of juicy ingredients. Salt will pull out more liquid in a minute.
The salad won’t hold its shape and falls apart when you plate it
That’s either a too-crumbly texture or the salad is too warm.
- Chill it for 15–20 minutes — it will firm up.
- Add the binding element gradually, mix, then let it sit for 5 minutes so everything “comes together.”
- Shape it using a bowl/cup rather than freehand — you’ll get cleaner sides.
It looks pale and a bit… awkward
Almost always, it’s missing contrast.
- Add something green on top (in small tufts), or dark specks (pepper), or one bright accent.
- Create a frame: place a few elements around the plate. Fast, and it looks intentional.
- Switch the dish. Sometimes the problem isn’t the salad — it’s the plate: too busy, too small, or the color blends with the food.
It looks heavy and “too mayo-ish”
Even if it tastes fine, it can look heavy because of the shine and density.
- Add something fresh and dry on top: herbs, thinly sliced crunchy veg.
- Serve a smaller portion, but make it prettier. A smaller portion looks lighter, and guests can always go back for seconds.
- Give it air: don’t fill the plate — leave space.
Small details that instantly level up your presentation
This is where the “magic” is — not complicated techniques, just attention. I love these details because anyone can do them, and they genuinely work.
The plate matters more than you think
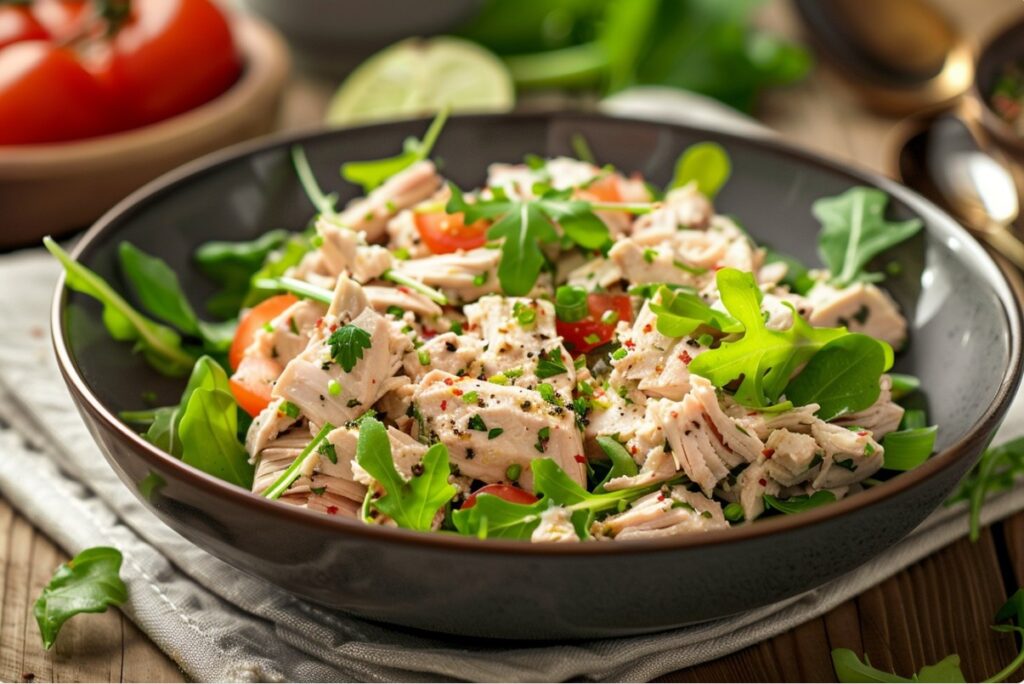
On a dark plate, a light salad looks more striking. On a white plate, it looks cleaner and lighter, but you’ll want contrast on top. On patterned plates, salads often get lost.
If you have a choice, go for a simple plate with no pattern. And ideally a bit larger than you think you need. A big plate doesn’t mean a big portion — it means breathing room.
Light and shine
Tuna salad is often matte. A touch of shine on top (a drop of dressing, a light gloss from oil, a juicy accent) makes it more appetizing. Just keep it controlled — not greasy.
Aroma is part of serving, too
When you bring the salad to the table, the first thing people notice is the smell. If there’s something fresh on top (herbs, a little zest, freshly ground pepper), the dish “wakes up.” It’s like opening a window: nothing major changed, but suddenly the room feels lighter.
Pace: don’t do it all in the last second
Presentation usually gets ruined not because you lack skills, but because you’re rushing. When you’re trying to talk to guests, chop, wash plates, and also “plate beautifully,” your hands move too fast — and everything comes out crooked.
One simple thing helps me: I set aside 5 minutes just for plating. No multitasking. In those 5 minutes I shape it, wipe the rim, add the finishing touches — done.
A beautiful tuna salad presentation for guests isn’t about complexity. It’s about control: not watery, readable texture, one or two contrasts, and a clean plate. After that, you can play — without worrying you’ll “ruin” it.
I’m curious: how do you usually serve salads when people come over — portioned, or in one big bowl? And what’s the hardest part for you: shaping, garnish, or keeping it from turning watery?
If you want to do more than just plate it nicely and actually play with flavors too, take a look at these menu recipe ideas for a festive table — you’ll find both simple options and more interesting combinations for special occasions.
FAQ
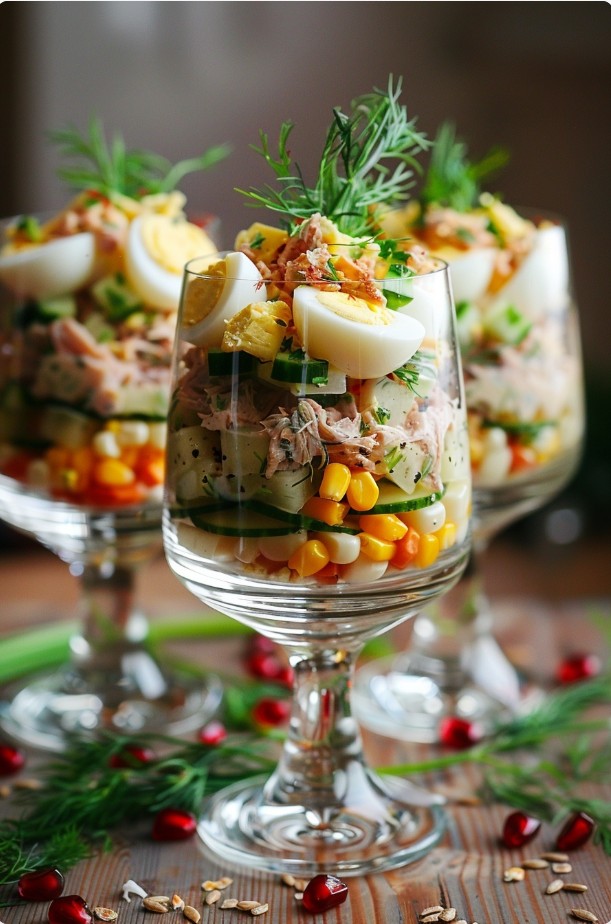
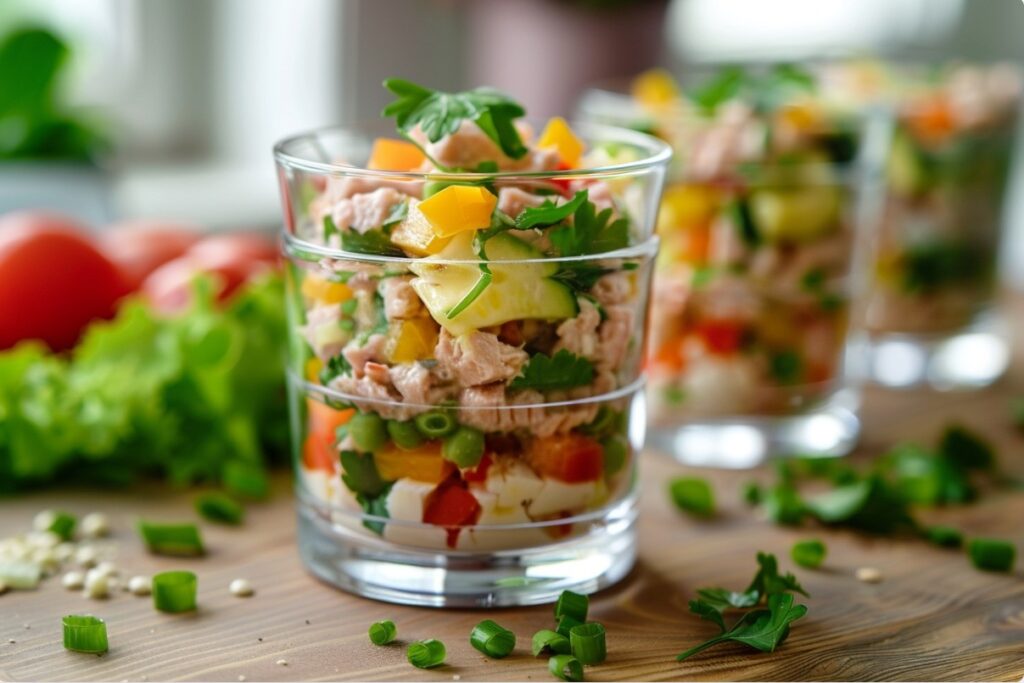
How can I make tuna salad feel more festive?
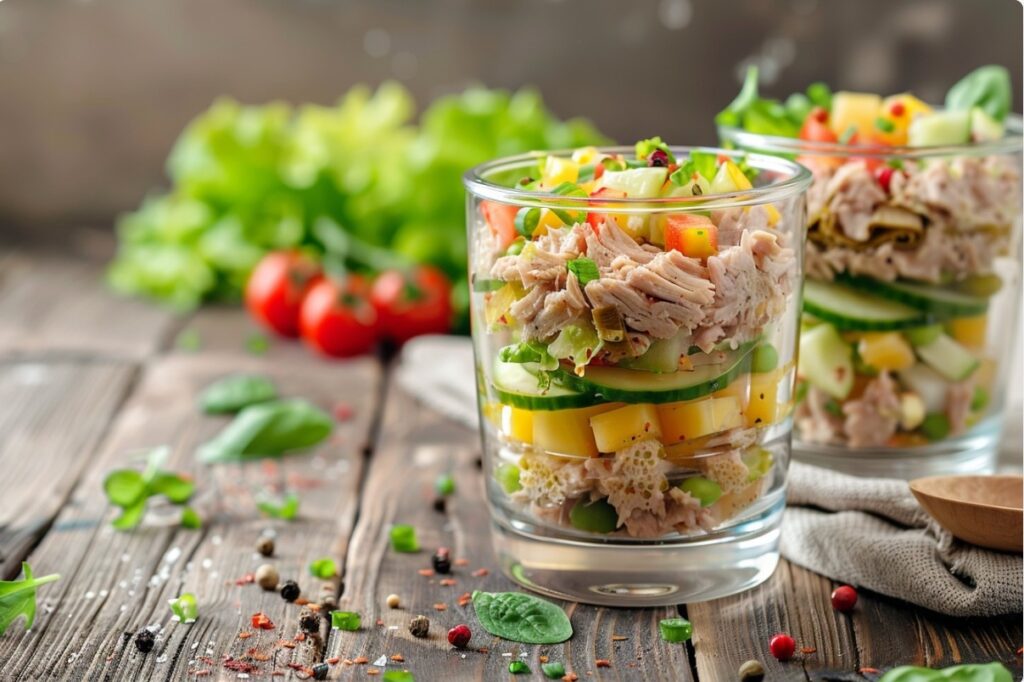
Switch up the presentation: serve it in clear glasses, small individual bowls, or shape it with a food ring. It instantly looks neater and more special, even with simple ingredients.
What kind of dishware works best for serving?
Clear glassware, dessert cups, or plain white plates highlight the salad’s colors best. For a modern look, choose minimal, simple shapes.
Is it worth making tuna salad in layers?
Yes. Layers are very eye-catching and help show off the texture of each ingredient, as long as there’s enough color/texture contrast to make them readable.
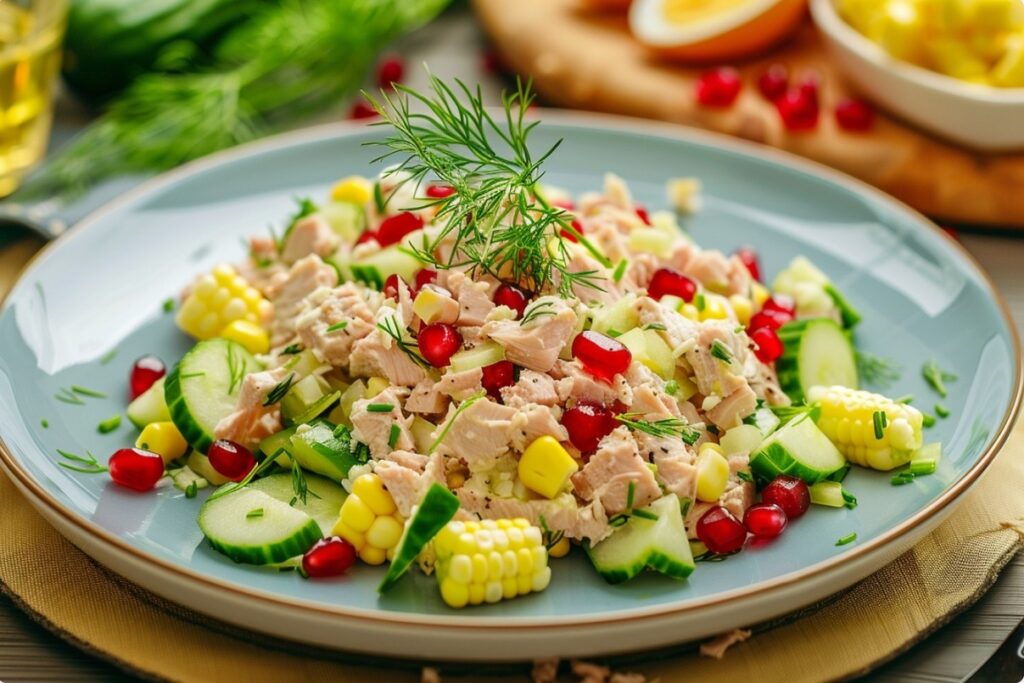
How do I garnish it without overdoing it?
Stick to one or two accents: a little greenery, a few pomegranate seeds, or a light drizzle of sauce. Keep the plate clean so the salad stays the focus.
Can I serve it on a large plate?
Yes — just shape it neatly. Use a ring mold or plate it in a compact mound so it doesn’t look scattered.
How do I make it more “Instagrammable”?
Use light-colored dishware, natural light, and a clean, defined shape. Visible tuna pieces add texture and make it look more appetizing.
Which colors matter most for a good presentation?
Contrast is key. A light tuna salad looks best with green herbs and a bright accent (like red onion, tomato, or radish) plus a few dark specks (pepper or olives).
Should I chill the salad before serving?
Yes. A chilled salad holds its shape better and plates more neatly. For best flavor, you can let it sit at room temperature for about 10 minutes before serving.