Perfect Homemade Pizza: Crispy Crust, Juicy Toppings, and the Right Heat
Homemade pizza often starts the same way: the dough seems fine, the toppings taste great, and then you pull it out of the oven… and it’s something between a pie and a hot open-faced sandwich. Pale edges, a soft bottom, cheese that’s melted into a greasy puddle, and a center so wet the slice only holds together on pure optimism.
I know that feeling—sliding the tray out and realizing: you did everything “right,” but it’s still not pizza-place good. The annoying part is it makes you think you need some magical recipe. Most of the time, it’s not the ingredients that are missing—it’s control over heat and moisture.
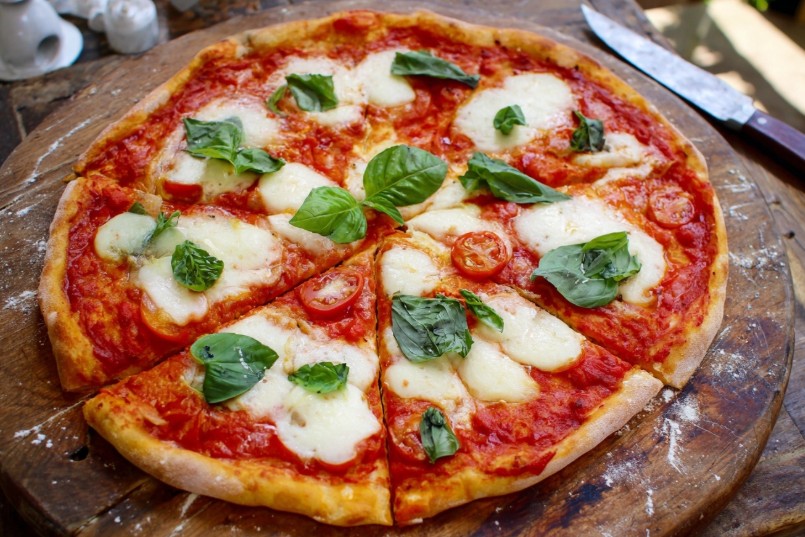
Perfect pizza is a balance: a crispy base (because the bottom had time to dry out and brown), juicy toppings (because you didn’t overcook them into oblivion), and the right temperature (because all of this needs to happen fast, almost at the same time). Once you understand the logic, the fear goes away—you’re not guessing anymore, you’re driving the process.
Why homemade pizza often turns out soft: the main enemy is water
The most common reason pizza turns “pie-like” isn’t the flour or the yeast. It’s water that didn’t get a chance to leave. It comes from everywhere: the sauce, the cheese, mushrooms, sausage, tomatoes, even the dough itself. If your oven is weak or slow, that moisture doesn’t evaporate—it turns the middle into a warm, steamy cushion.
In a pizzeria, the oven runs insanely hot. Evaporation happens at full speed and the crust sets quickly, forming a thin little “armor” that holds its shape. At home we often do the opposite: put pizza into an oven that isn’t fully preheated, or bake it forever at a medium temperature. The toppings release water, the dough absorbs it—and hello, soggy center.
How it should be vs. how it usually goes
How it should be: the bottom gets strong heat from below (stone/steel/hot tray), the top gets enough heat for the cheese to melt and lightly brown, and the rim puffs up and turns springy. All of that happens quickly.
How it usually goes: a thin dough round goes onto a cold tray, gets generously sauced, buried under a thick layer of cheese and watery vegetables, and then bakes for a long time. The bottom never has a chance to crisp up—it’s basically steaming in its own moisture.
Tip: think of pizza as a “battle for dryness.” You’re not drying the toppings into croutons—you’re just not letting moisture win against the crust.
A tiny story from my kitchen: I used to stubbornly add fresh button mushrooms raw—“because they’ll be juicier.” Then I’d wonder why the dough under the mushrooms was always pale and soft. The first time I quickly heated the mushrooms in a dry pan (not to cook them through, just to drive off some moisture), the problem disappeared. Not magic—physics.
Temperature and time: why pizza loves heat, not patience
Pizza isn’t a baked casserole. It doesn’t need 25–30 minutes “so it bakes through.” It needs short, aggressive heat. The reason is simple: the dough should puff and brown while the toppings still taste fresh, and the cheese is in its best phase—melted, stretchy, lightly blistered, not split into grease and rubber.
When the temperature is low, you end up baking longer. During that time:
- moisture slowly seeps out of the toppings and into the dough;
- the cheese overheats: it melts, then tightens up and can turn tough;
- the edges dry out but don’t brown properly—dry, yet pale.
What happens to dough in high heat (in plain English)
At high temperature, the dough goes through several stages almost at once. First, the gases inside (from yeast/fermentation and simple heat expansion) expand—the rim rises. Then the surface dries quickly and starts to brown—that’s the same set of reactions that create that “fresh-baked” smell. With enough heat from below, the bottom turns crisp while the inside stays soft and elastic.
On a home setup it often looks like this: the oven feels hot, but the tray is still cool. You slide the pizza in and the first 5–7 minutes the dough is just warming up, losing its chance for a sharp “launch.” Pizza loves a launch.
Tip: if you’re torn between “turn the heat up a bit” and “leave it in a bit longer,” heat almost always wins.
Another quick story: I once baked two pizzas back to back. The first went on a tray I hadn’t preheated. The second went on the same tray, but now it was blazing hot from the first bake. The second pizza was twice as good: the bottom actually crackled when I tapped it, and the center held its shape. That’s when I fully bought into the power of a properly heated surface.
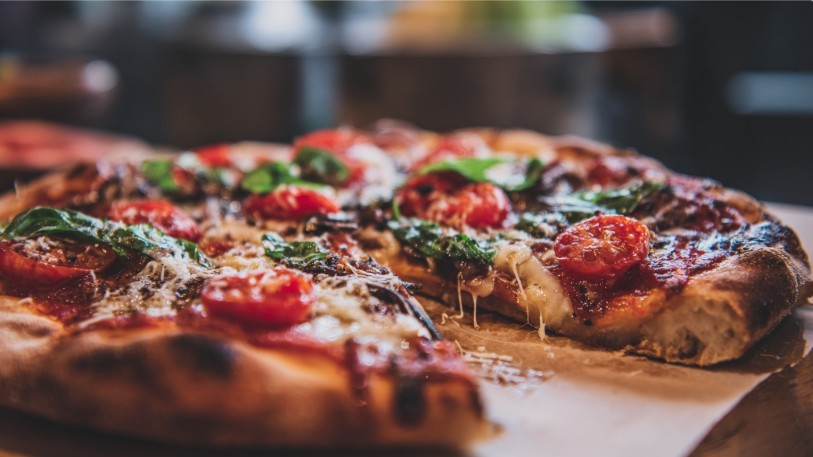
A crispy base: how to get a bottom crust that actually crunches
That crisp bottom comes down to two things: strong heat from below and a reasonably dry dough surface. You can have amazing dough, but if it lands on a barely warm tray, the bottom will be soft. And the other way around: even simple dough on a hot stone often turns out great.
A hot surface: stone, steel, tray, skillet
One idea: give the dough a heat shock from underneath.
- A pizza stone holds heat for a long time and gives steady, even baking. It needs longer preheating than you think because it’s heavy.
- Baking steel (a steel plate) is even more aggressive and transfers heat faster—your bottom browns quickly.
- An upside-down baking tray is my favorite home hack when you don’t have anything fancy. Flip it, preheat it, and launch the pizza onto the smooth hot surface. No rim means it’s easier to slide on with a peel or parchment.
- A cast-iron skillet works too: preheat, add dough, add toppings, then into the oven under strong top heat. Just don’t go too big—maneuvering gets awkward.
The key point: however you do it, the surface needs to be genuinely hot. Not “warm-ish.” If you can comfortably hold your hand over the tray for a while, you’re not there yet.
Flour, semolina, and those little “ball bearings” under the crust
To prevent sticking during the transfer, people often use a lot of flour. Then it burns on the bottom and tastes bitter. What helps me is a very thin layer—and better yet, not plain flour but fine semolina or a mix. It acts like tiny ball bearings. Just don’t overdo it: too much and it turns into gritty sand in your mouth.
Tip: if you’re worried about sticking, build the pizza on parchment—but for the last 1–2 minutes, pull the parchment out and finish the pizza directly on the hot surface. The bottom will dry out and brown better.
Crust thickness and the “timing window”
Thin pizza bakes fast and forgives less: a little extra sauce and the center goes wet. A thicker base gives you more time, but then it’s easy to dry out the top while the bottom catches up. That’s why I like the middle ground—not paper-thin, but not a bread pie either. You get a few minutes of wiggle room and real crispness.
Smell is the best timer. When it stops smelling like just “warm bread” and you get that nutty, toasted note, the bottom is close. If the cheese is still pale at that point, you either don’t have enough top heat or the pizza is sitting too low.
Juicy toppings without the swamp: managing moisture and weight
Toppings should be juicy, not watery. Two simple rules save you almost every time: don’t overload and remove excess moisture before the oven. Pizza isn’t a salad. If you pile on everything in the fridge, it physically can’t bake the way pizza is supposed to.
Sauce: thin, not generous
A lot of people sauce pizza like pasta—thick and plentiful. On pizza it works differently: you want a thin layer for flavor and aroma, not a gravy. If you can see puddles, that’s your sign.
My rule of thumb: the sauce should cover the dough, but you should still see the base peeking through in spots. That’s not stingy—it’s texture insurance.
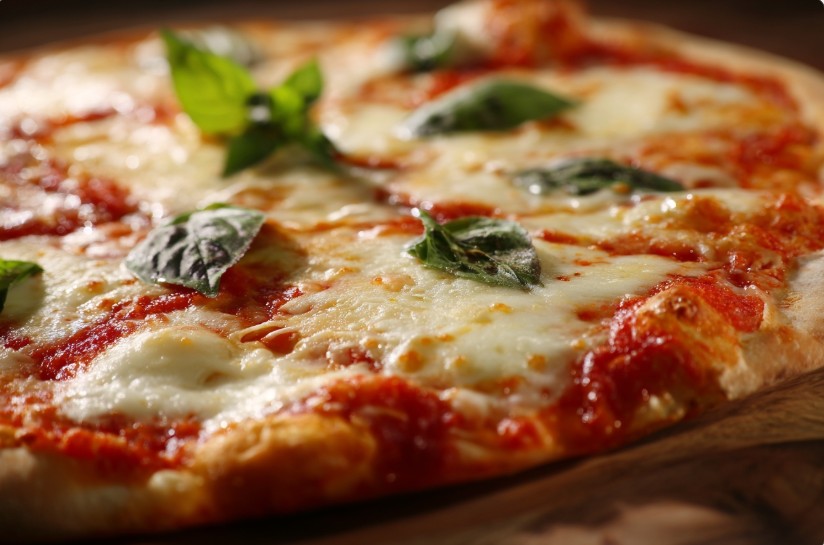
Cheese: it’s not just “how much,” it’s also “when”
Cheese is wonderful, but it brings moisture and fat. Too much of it creates a “blanket” that steams everything underneath, so the center stays wet longer.
I like a two-stage approach: some cheese at the start to bind the toppings, and a little more closer to the end for fresher aroma and prettier browned spots. Not a rule—just a handy move when you want more control over the top.
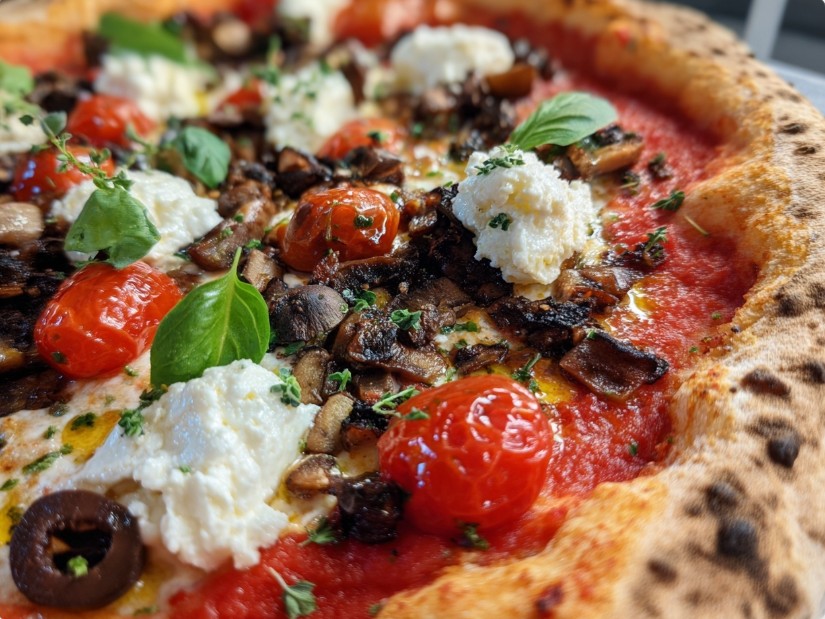
Vegetables and mushrooms: the most common troublemakers
Fresh tomatoes, button mushrooms, zucchini, spinach—these all release water. Add them raw and generously and they’ll soak the center even in a decent oven.
- Mushrooms: quickly heat in a dry pan to steam off some moisture.
- Tomatoes: slice and let them sit on a paper towel to pull off surface juice.
- Leafy greens: add at the end or in a very thin layer—they wilt instantly and release moisture.
Tip: if the toppings look “tall,” stop. Pizza should be flat. Height almost always means baking problems.
Quick confession: I had a “pizza with everything” phase. I built it like a party platter—olives, corn, peppers, sausage, and then some. It looked generous, but it ate badly: slices flopped, the center went wet, and the edges dried out. The moment I started doing less, the pizza suddenly tasted like pizza—not a loaded pie.
How your oven really works: where to place the pizza and how to read the heat
Home ovens vary wildly. And even the same oven behaves differently depending on what you’re baking, which rack you use, and whether you open the door every two minutes “just to check.”
With pizza, the bottom and top need to finish at the same time. If the bottom is pale but the top is already done, the pizza is too high or the surface underneath wasn’t hot. If the bottom is dark but the cheese hasn’t properly melted, the pizza is too low or you don’t have enough top heat.
Oven rack positions: a practical guide
I often start on a lower-middle rack to get the bottom going. Once I can tell the bottom is close, I’ll sometimes move it up for a minute or two to finish the top nicely. It’s not always necessary, but it can save you if your oven is weak from above.
If you have a setting with stronger top heat, it’s useful at the end. It’s also easy to overdo: the cheese can spot-brown fast and start drying out. The rule here is simple—better a short finish than a long “browning session.”
Why preheating isn’t a formality
Your oven can show the target temperature and still not be truly ready. Especially your stone/steel/tray. I give it time—and this is one of the few moments where waiting actually matters.
You’ll notice the difference even without a thermometer: in a properly heated oven, the pizza starts puffing almost immediately, the rim “wakes up,” the cheese melts quickly, and the smell gets bold right from the start.
Tip: open the door and you lose heat. With pizza that’s critical because it bakes fast. Watch through the glass—don’t “air out” your oven.
Dough as a system: gluten, fermentation, and why it tears
I know the word “gluten” can sound like something from a textbook, but in practice it’s very hands-on. When dough is well-developed and rested, it stretches, springs back, and holds gas. When it isn’t, it tears, sticks, fights you—and after baking it turns either rubbery or crumbly.
For pizza you need two things: dough that can stretch into a thin round without holes, and dough that gives you a nice rise around the rim. That comes from structure inside the dough and the gas it’s built up.
Why resting the dough works
If you knead the dough and immediately start stretching it, it resists and snaps back. That doesn’t mean it’s “bad dough”—it’s normal. Resting lets the structure relax. After a pause, the dough becomes more cooperative and you tear it less.
Another small kitchen moment: I used to wrestle dough—pulling, twisting, adding flour, getting annoyed. Then I tried simply leaving the dough ball under a bowl for 15 minutes. I came back and it stretched twice as easily. That’s the day my kitchen stopped feeling like a boxing ring.
Why too much flour while shaping is a trap
When dough sticks, your hand automatically reaches for more flour. But excess flour on the surface prevents the rim from sealing nicely and can make the edge dry. It also burns on a hot surface. What I do instead: minimal dusting, quick movements, and if the dough is truly sticky—either give it a bit more rest or work on a very lightly oiled surface (very lightly), rather than snowing it over with flour.
Signs your dough is “ready to shape”
- springy, but not rock-hard;
- stretches without tearing, and if a spot gets thin you can stop in time;
- the surface looks smoother than right after mixing;
- it smells pleasant, slightly bready, not sharp.
Don’t chase perfection here. Homemade pizza can be a little lopsided—that’s fine. What matters is fairly even thickness and no “lake” of sauce in the center.
Common beginner mistakes: what breaks pizza the fastest
I’ve seen dozens of versions of “why it didn’t work,” and most of them come down to a few repeat offenders. Here they are—no shame, because almost everyone goes through this (me included).
1) A cold base and an oven that’s “warm… somewhere in the background”
The oven seems preheated, but the stone/tray isn’t. The pizza starts slowly and the bottom never crisps. Fix: preheat the surface longer than it takes the oven to beep.
2) Too many toppings
Pizza should be flat. A thick layer of toppings makes it bake like a casserole: long, steamy, wet in the middle. Fix: less, thinner, more intentional.
3) Too much sauce
Juicy doesn’t mean puddly. Fix: a thin layer, no “gravy.”
4) The cheese burned but the bottom is pale
The pizza is too high or the top heat is too strong at the start. Fix: start lower/on a hot surface, then boost the top at the end.
5) The dough tears while shaping
Not enough rest or too aggressive stretching. Fix: pause, gentler hands, don’t pull the center until it’s see-through.
Tip: if you’re not sure what went wrong, look at the bottom. It tells the truth about whether you had enough heat and whether excess moisture had time to evaporate.
What to do when something goes wrong: quick troubleshooting without panic
Pizza is fast, which is exactly why mistakes show up immediately. That’s also the good news—you learn quickly. Here are a few common situations and what I do in the moment.
The bottom is pale and soft, but the top is already done
Classic. In the moment, you can:
- move the pizza lower in the oven, closer to the bottom heat source;
- if possible, finish it directly on the hot surface without parchment (carefully, so you don’t tear it);
- give it a few more minutes, watching so the cheese doesn’t dry out.
Next time: preheat the tray/stone longer, or start on a lower rack.
The center is wet, like it “didn’t bake through,” even though it already took forever
Often it’s not raw dough—it’s moisture from the toppings. In the moment, this helps:
- raise the temperature (if you can) or add a short burst of top heat to evaporate moisture faster;
- let the pizza rest 2–3 minutes before slicing so steam can escape and the structure can set.
Next time: less sauce, drier vegetables, don’t overload the cheese.
The edges are hard and dry, like croutons
This happens when pizza bakes too long at a moderate temperature. In the moment there’s not much to do, but next time:
- increase the temperature and shorten the bake;
- watch that you’re not over-flouring the rim;
- don’t keep it in “just to be sure”—it’s better to pull it a minute early; it finishes on residual heat.
The cheese turned tough and rubbery
The cheese overheated. It passed the perfect melt stage and kept going. In the moment: pull it out. Next time: either bake shorter (higher temperature) or add part of the cheese closer to the end.
The pizza stuck and tore while transferring
This happens even to experienced cooks, especially with softer dough. In the moment:
- don’t yank—slide a thin spatula/metal turner/wide knife underneath and gently unstick it;
- if there’s a hole, patch it quickly with a small piece of dough from the edge and press to seal;
- if it’s already a mess, fold it back into shape and bake it anyway—imperfect, still delicious.
Next time: assemble quickly, don’t let the sauced dough sit around (it starts soaking), use parchment or a little semolina underneath.
Last little story: once my pizza stuck so badly I pulled it off in “waves.” I was annoyed for about two minutes, then I baked the waves and served it as “rustic homemade.” The guests ate it faster than I could explain why it was wavy. Good reminder: a mistake doesn’t always equal a failure.
Perfect homemade pizza isn’t about a secret list of ingredients. It’s a few controllable things: strong bottom heat, enough top heat, moisture management, and restraint with toppings. Once you start watching the underside, the color of the rim, and how the cheese behaves, pizza stops being a lottery.
What’s your most common homemade pizza problem: a soft bottom, a soggy center, or “wrong” cheese? Describe what you’re getting, and I’ll tell you where the cause usually hides.