Why Eclairs Crack in the Oven (and How to Stop It)
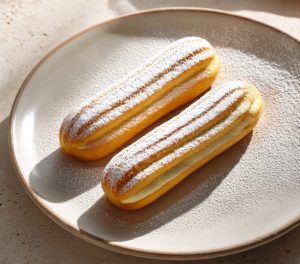
There’s this moment in the kitchen: you open the oven door and there they are—eclairs that are almost a total win. They’ve puffed up, they’re holding their shape, the whole kitchen smells like butter and warm pastry… and then you spot it. Cracks. Not the charming, intentional “rustic” kind—more like rough splits, as if the dough simply couldn’t handle the pressure.
The sneakiest part is that cracks don’t always show up right away. At first everything looks fine, and then—bam—a scar runs across the top. You’re left with that feeling of “I messed something up,” but what exactly isn’t obvious, because choux pastry doesn’t let the little things slide.
What helped me most was stopping thinking of an eclair as a “recipe” and starting to see it as a process: how the dough holds moisture, how steam builds, how the skin sets, and whether it has time to stretch. Once you look at it that way, cracks stop being a mystery—they become a clue. And yes, you can fix them, or at least cut them down dramatically.
Below is everything I wish someone had spelled out for me earlier: consistency, what to look for with your hands, patience, and the small signals your oven and dough give you before an eclair decides to split.

A crack isn’t a failure—it’s steam picking a fight with the crust
Eclairs crack for one main reason: steam pressure builds too aggressively inside, and the outer shell can’t stretch anymore. Think of a balloon being inflated, but one spot has already dried out and turned stiff. It won’t stretch—so it bursts at the weakest point.
Choux is basically a water-driven pastry. As it heats, the water turns to steam; that steam inflates the piped dough and creates the hollow center. The “skin” is a mix of gelatinized starch, proteins from flour and eggs, plus fat. It needs to set… but not become brittle too early.
When an eclair cracks, it usually means one of these (or both at once):
- Steam ramps up too fast (too hot at the start, dough is too wet, structure isn’t right).
- The crust sets too early (surface dries out, wrong consistency, overly strong top heat, drafts/sudden temperature swings).
I used to bake eclairs in a home oven that “shot” temperature in waves. The display said 200 °C, but in reality it swung—190, then 230. The eclairs would surge up like crazy, and almost every single one split on top. I blamed my piping bag and tip. Turns out it was pure physics: steam was pushing against a shell that had already gone rigid.
So the first step isn’t hunting for a magical reason. Look at the basics: how your oven behaves, what your dough feels like, and how quickly the surface starts to form a skin.

Choux pastry consistency: why “just a bit looser” almost always ends in cracks
Choux loves precision—but not just on the scale. It’s tactile. You can weigh everything to the gram and still end up with a different texture, because flour can be drier or more humid, eggs vary in size, and the panade (the cooked flour paste) can be reduced more or less depending on how long you cooked it.
One of the most common reasons for cracking is dough that’s too wet. It looks “perfect”: glossy, pipes easily, settles into pretty ridges. But in the oven that extra moisture turns into extra steam. The eclair expands fast, the shell doesn’t strengthen evenly in time—and it splits.
How the right choux should feel
I rely on a few cues. They’re simple, but they’re consistent:
- The dough holds its shape. Drag a spatula through it and the groove slowly relaxes, but it doesn’t disappear instantly.
- Lift the spatula and it falls in a heavy ribbon. At the end you’ll see a little “beak” that softly bends over—it shouldn’t stand straight up, and it shouldn’t run like batter.
- The surface is glossy but not “wet.” Gloss comes from eggs; wetness usually means too much liquid.
What people often do: add all the eggs at once (or “just to be safe”), and the dough ends up softer than it should be. On the counter it looks nice. In the oven—cracks, lopsided shapes, and sometimes a hollow with paper-thin walls.
Tip: eggs aren’t a fixed number—they’re your adjustment knob
I add eggs to choux in portions and stop the moment the dough “clicks” into the right feel. Better to leave a spoonful of egg in the bowl than to spend the bake chasing cracks and collapses.
If you’re working without a scale (or even with one), it helps to beat the eggs in a separate bowl and pour them in gradually. That way you won’t overshoot the texture you need.
One more thing people don’t mention enough: dough that’s too stiff can crack too. It doesn’t stretch well, the shell turns thicker and rougher, and the rise can be uneven. But at home, the more common issue is definitely dough that’s too loose.
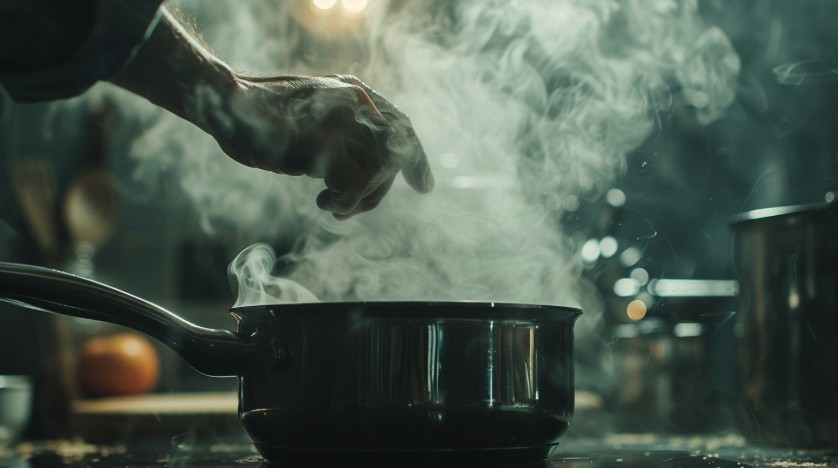
Cooking the panade: what’s happening in the pot—and how it leads to cracking
That stage where you dump flour into hot liquid and stir like your life depends on it can feel “technical.” It’s actually the foundation. This is where you build a base that will either handle steam pressure—or create weak spots that split later.
When flour hits near-boiling liquid, starch starts to gelatinize: granules swell and bind water. At the same time, some flour proteins begin to set. The result is a thick paste. When it’s done right, it:
- holds water inside the structure instead of releasing it randomly;
- turns into an elastic shell once eggs are added;
- rises evenly, without dramatic tearing.
Undercook the panade and you’ll get a weak shell
A classic home scenario: someone’s afraid of “drying it out,” so they keep the pot on the heat for barely a minute. As soon as the dough comes together in a ball, they pull it off. The paste still contains too much free moisture; the starch hasn’t properly bound the water. Then you add eggs and the dough becomes overly soft and unstable.
How do you tell without a thermometer? When the panade is ready, it:
- forms a smooth ball,
- leaves a thin film on the bottom of the pot (not black, not burnt—just a light coating),
- smells warmer and slightly nutty, not just raw flour.
One more cue I love: as you stir, the dough starts to rustle against the sides and feels springier. Not magic—some water has evaporated and the structure has tightened up.
Overcook the panade and the dough can tear because it’s too stiff
The other extreme is keeping it on the heat until it’s very dry and looks ragged. Eggs can sort of rescue it, but the structure ends up coarse. The eclair rises, but the shell is less elastic—so when it expands quickly, it can crack not from too much steam, but because the “material” simply doesn’t stretch well.
Patience matters here, but don’t turn it into a marathon. I usually keep the panade on the heat a little after it comes together, stirring constantly. A few minutes is enough. If you see it turning matte, dry, and breaking into pieces—you’ve gone too far.

Oven temperature & settings: why “I’ll crank it up so they rise” is a bad idea
Eclairs need a strong start—but a controlled one. Steam should form actively, but the shell has to have time to stretch. If your oven blasts intense top heat or the overall temperature is too high at the beginning, the top sets faster than the inside can rise evenly. Then pressure looks for an exit—and finds it as a crack.
In a home oven it often looks like this: the oven is preheated, the tray is hot, you slide the eclairs in—and within minutes the surface is already browning in patches. Inside is still basically a swamp, while the top has turned into armor.
How to read your oven without gadgets
I’m a big fan of simple observations:
- If the tops darken too early while the sides stay pale, you’ve got aggressive top heat or your tray is too high.
- If eclairs rise fast but then one side tears and twists, it’s often uneven heating (the oven runs hotter on one side).
- If cracks appear almost immediately—before the eclair has formed a smooth skin—your starting temperature is too high or the tray is too close to the heating element.
Tip: don’t open the oven—but don’t make it a religion either
I don’t open the oven for the first 15–20 minutes, because that’s when the eclair is “building” its hollow center. But if the oven is clearly overheating and the tops are burning, it’s better to react quickly than to heroically watch cracks happen.
Yes, a temperature drop can deflate pastries. But cracks often come from overheating. So sometimes a quick intervention (move the tray down, reduce the heat) saves the whole batch.
One more nuance: convection. A fan dries the surface faster. For eclairs that can be a problem—the skin hardens while pressure is still building inside. If you bake with convection and keep getting cracks, try a no-fan setting or a lower temperature. Not as a universal rule—just as a test for your oven.
Piping & surface: tiny pre-oven “scars” turn into big cracks
A crack often starts before the tray even goes into the oven. Any unevenness—ridges from the piping tip, a sharp little tail, an air bubble—is a weak point. As the eclair expands, tension concentrates right there.
I remember rushing before a holiday: I piped the eclairs and left a tiny point sticking up on each one. “It’ll smooth out in the oven,” I told myself. It didn’t. That point dried first, turned into a hard spot—and cracks radiated from it. The whole batch looked scratched up.
How it should look vs what people often do
- How it should be: even strips or neat “fingers,” no sharp peaks, surface as smooth as possible.
- What people often do: yank the bag away and leave tails; pipe in jerky motions; make pieces that are too thin/too thick on the same tray.
Tip: smooth the surface with a damp finger
If you’ve got a little “beak” after piping, dip your finger in water and gently smooth it down. It’s a tiny step, but it removes one of the most common causes of cracking.
The water isn’t there to “soak” anything—it just keeps your finger from sticking and helps you get a cleaner surface. A slightly damp spoon or silicone spatula works too—use what feels natural.
Also important: consistent size. If your tray has eclairs of different thicknesses, the small ones set faster and the big ones lag behind. You’ll start chasing doneness, and along the way some will dry out while others stay underbaked—and cracks will show up in waves.

Moisture, steam, and skin: the deeper mechanics that actually calm you down
This is where choux becomes wonderfully logical. An eclair goes through three phases in the oven, and cracks are most often born right at the transition between phase one and two.
Phase 1: the big surge (steam works like a jack)
While the dough is still soft, water evaporates quickly and steam inflates the pastry. When everything is on track, the eclair rises evenly, the surface stays elastic, and it puffs like a little pillow.
If the top has already dried out at this stage (convection, too much heat, too close to the upper element), it loses elasticity. The rise continues, but the shell can’t stretch—so it tears.
Phase 2: setting the shape (the skin becomes the frame)
At a certain point, proteins from eggs and flour coagulate, starch finishes setting, and the shape becomes stable. If that frame forms evenly, the eclair holds. If it sets in patches (dry here, wet there), you get uneven tension—and cracks.
Phase 3: drying (so they don’t collapse)
Once the eclair has fully risen, the job is to dry the walls so they won’t sink after baking. You can still cause trouble here: if you dry too aggressively too early, the shell turns brittle and can crack from internal pressure that hasn’t finished building yet.
This mindset helps me every time: an eclair is controlled steam. Not “make it hotter,” but “let steam work at a pace the shell can handle.”
Beginner mistakes that almost guarantee cracks
Here’s what I see most often—both in my own early attempts and in friends’ “help, what went wrong?” messages.
- Adding eggs to a hot panade. Part of the egg cooks into little bits, the dough becomes uneven, and the eclair tears where the structure is weakest. The base should be warm, but not hot to the touch.
- Dough that’s too loose. Too much steam, thin walls, a sudden rise, cracks on top or along the side.
- Overly strong top heat / baking too high in the oven. The top dries first and turns into a “shell.”
- Messy piping. Peaks, grooves, bubbles—future tear lines.
- Rushing the oven temperature. The oven “seems preheated,” but it’s still cycling wildly—or it’s overheated from a previous bake.
- Opening the oven too early and for too long. The eclair is still soft and the frame hasn’t set; it can warp, then crack when the heat builds back up.
And one more mistake that sounds minor but matters: not mixing until fully smooth after each addition of egg. You can end up with thicker patches of paste and looser patches of dough in the same bowl. In the oven they behave differently—and the crack becomes the border between them.

If your eclairs are already cracking: a quick visual diagnosis
When cracks have already appeared, you want to switch the oven off and pretend it never happened. But honestly, this is the best moment to figure out the cause. Eclairs are brutally honest—they show you exactly where the process went off track.
A long crack right down the center of the top
Often it’s a combo: the surface dried faster (top heat/convection), while the rise was very active (wet dough or an overly hot start). Next time, try:
- reducing top heat aggression (lower rack, different setting),
- checking the dough texture—make sure it isn’t too soft,
- smoothing the surface after piping.
A side crack, like the eclair split along a seam
This usually points to uneven heating or one side being weaker: an air bubble, uneven thickness, or the edge of the tray sitting closer to the oven wall. What helps:
- placing the tray in the center,
- piping pieces that are truly uniform,
- if your oven bakes unevenly, rotate the tray—but only after the eclairs have stabilized (not right at the start).
Lots of tiny cracks all over
This is usually over-drying: temperature too high, convection drying too aggressively, or the eclairs simply stayed in too long. The fix isn’t “more heat to brown them,” but the opposite—find a gentler setting.
Cracked—and crooked, too
That’s almost always a mix: consistency + piping + oven behavior. I’d start with the most controllable part—the dough. If the dough is stable, even a moody oven forgives a lot more.
When something goes wrong, I don’t change everything at once. I change one variable at a time: either the dough texture, or the rack/setting, or the piping. Otherwise you’ll never know what actually fixed it.
Patience and your hands: learning to feel “done” without panicking
Choux pastry scares people not because it’s complicated, but because it’s “alive.” Today it’s thicker, tomorrow it’s looser. Today your oven behaves, tomorrow it doesn’t. What saves you is getting used to trusting what you see and feel instead of baking from fear.
I once worked in a kitchen where eclairs were baked daily. The best batches didn’t come from the person who knew the “correct numbers,” but from the person who noticed tiny shifts: how the dough shines, how it stretches, how the panade smells, how quickly the surface sets in that specific oven. That isn’t talent—it’s repetition.
A few things that genuinely give you more control
- Cool the panade before adding eggs. Not cold—just “warm, but comfortable to touch.” You’ll get a smoother, more even dough.
- Add eggs in portions. The simplest way to avoid making the dough too loose.
- Let the dough rest for 5–10 minutes. Sometimes it “settles”: flour finishes absorbing moisture and the texture stabilizes. Not always critical, but often helpful—especially in a warm kitchen.
- After piping, look at the surface from an angle. Light will reveal bumps and peaks worth smoothing.
- Listen near the end of baking. Well-dried eclairs sound lighter and more hollow. If there’s still lots of moisture inside, the sound is duller. It’s subtle, but once you notice it, you can’t un-hear it.
One last little story. I once baked eclairs at a friend’s place, in an oven I’d never used before. They were more nervous than I was. I did two things: piped neatly and dialed in the dough texture carefully. The oven was still temperamental, but the cracks dropped dramatically. Good lesson: the biggest things you control are the dough and the shape. And that’s often enough to get a beautiful result.
Cracks on eclairs aren’t a verdict, and they don’t mean you “don’t have the hands for it.” It’s a signal: steam was stronger than the shell, or the shell turned rigid too early. Once you start seeing an eclair as a balance of moisture, temperature, and elasticity, it becomes predictable.
How do your eclairs usually crack—on top, on the side, or in a fine little network? Describe what they look like and when it happens. I genuinely love this kind of kitchen detective work.